
Bouldering in national parks offers a unique climbing experience on natural rock formations. This guide covers everything you need to know, from top destinations like Joshua Tree, Yosemite, and Rocky Mountain National Park to essential gear, safety tips, and rules for preserving these protected areas.
Key Highlights:
- Top Parks for Bouldering: Joshua Tree (over 2,000 problems), Yosemite (1,400+ problems), and Rocky Mountain (high-altitude alpine granite).
- Essential Gear: Crash pads, climbing shoes, chalk (color-matching in some parks), brushes, and wag bags for waste.
- Rules & Restrictions: Follow Leave No Trace principles, use designated trails, and check for required permits or seasonal closures.
- Best Seasons: Fall to spring for Joshua Tree, spring and fall for Yosemite, and summer to early fall for Rocky Mountain.
Bouldering combines physical challenge with stunning natural settings, but it also requires responsibility to protect these spaces for future climbers. Let’s dive into the details!
Joshua Tree Beginner Bouldering (V0-V2) | The Outback
sbb-itb-00512f3
Best National Parks for Bouldering
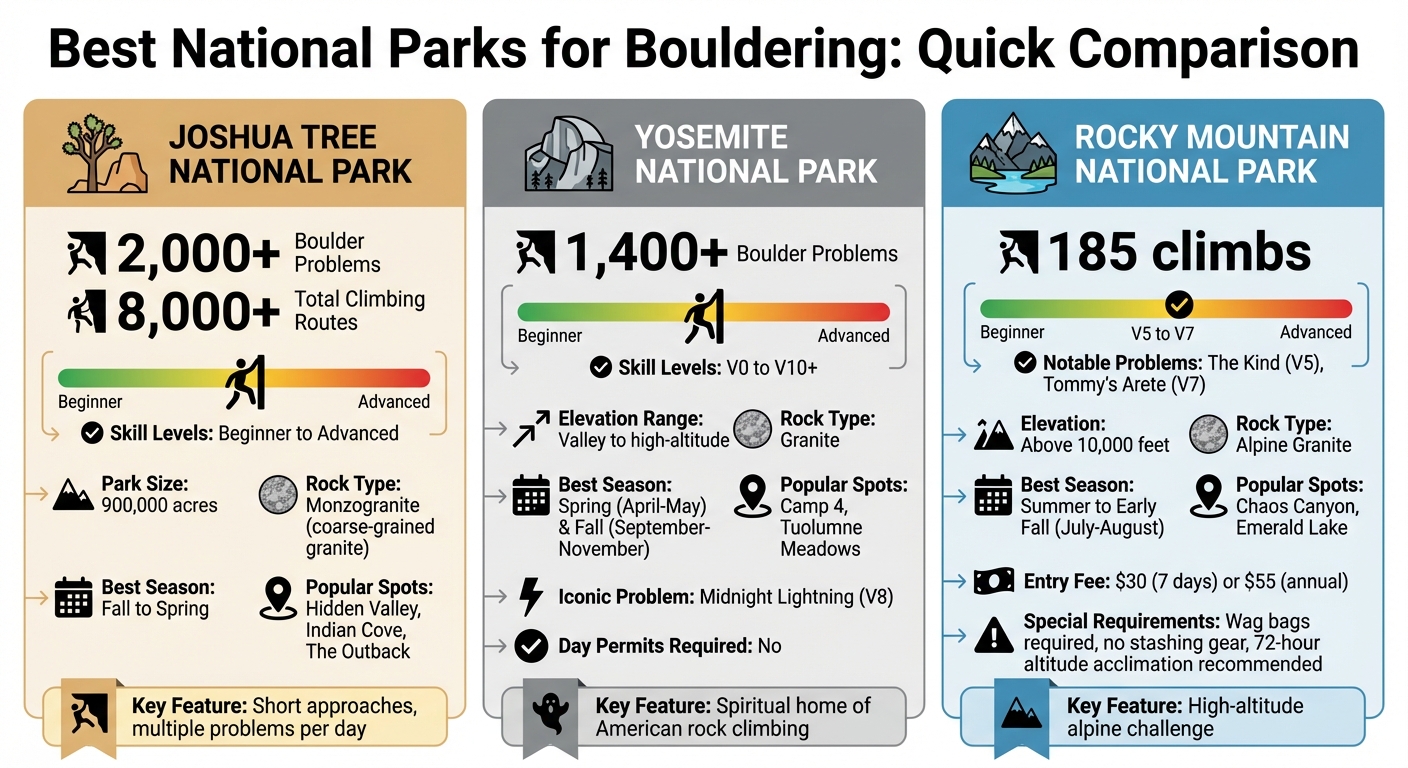
Top 3 National Parks for Bouldering: Comparison Guide
The United States is home to some of the best bouldering spots in the world, offering a variety of rock types, terrains, and challenges. From desert landscapes to alpine granite, these parks cater to climbers of all skill levels. Here’s a closer look at three standout national parks for bouldering enthusiasts.
Joshua Tree National Park
Joshua Tree is a bouldering haven, featuring over 2,000 boulder problems and more than 8,000 climbing routes spread across its vast 900,000-acre expanse. The park’s signature monzogranite, a coarse-grained granite known for its excellent friction, provides climbers with secure footing and handholds for challenging routes. The best time to visit is between fall and spring, when the desert temperatures are more forgiving.
Popular climbing spots include Hidden Valley, Indian Cove, and The Outback. These areas offer a mix of routes, ranging from beginner-friendly problems to advanced challenges. With short approaches to many boulders, climbers can tackle multiple problems in a single day, making Joshua Tree a versatile destination for all levels.
Yosemite National Park
Yosemite is often referred to as the "spiritual home of American rock climbing", and for good reason. Its granite boulders are legendary, offering climbers a mix of history, technique, and friction unique to the area. The park boasts approximately 1,400 boulder problems, ranging from technical low-ball challenges to towering 30-foot highballs that demand multiple crash pads and a skilled spotter.
Camp 4 is the heart of Yosemite’s climbing culture and the site of the iconic Midnight Lightning (V8) problem. For those just starting out, beginner-friendly routes like Presidential Traverse (V0) and Initial Friction (V1) are great introductions to Yosemite granite. Intermediate climbers might enjoy classics like Bachar Cracker (V4) and So Good (V5), while advanced climbers can test their skills on problems like King Air (V10). As Dean Potter once said:
King Air is the most beautiful boulder problem I’ve ever done… You would be hard pressed to find any line, more aesthetic.
The best times to climb in Yosemite Valley are during spring (April–May) and fall (September–November), when the granite offers optimal friction. For summer climbing, Tuolumne Meadows provides a cooler, high-altitude alternative. No permits are required for day bouldering, making it easy to plan a spontaneous session.
Rocky Mountain National Park
For those seeking a high-altitude challenge, Rocky Mountain National Park (RMNP) delivers with its alpine granite formations. Key bouldering areas like Chaos Canyon and Emerald Lake sit at elevations above 10,000 feet, offering approximately 185 climbs, including notable problems like The Kind (V5) and Tommy’s Arete (V7).
The prime bouldering season in RMNP runs from summer through early fall, as snow often persists in the higher elevations until mid-July. However, climbers should be prepared for sudden storms and lightning, which are common in these exposed alpine areas. RMNP enforces a strict no-stashing policy, meaning all gear, including crash pads, must be packed out daily. Additionally, wag bags are required for human waste due to the fragile alpine environment.
Environmental stewardship is especially important here, as most bouldering sites are in federal Wilderness areas. Researchers have identified nearly 3 miles of informal trails in popular zones, emphasizing the need to stick to established paths to protect sensitive ecosystems. Seasonal raptor closures (February 15–July 31) and voluntary restrictions, such as avoiding the Meadow Boulder in Upper Chaos Canyon to protect pika habitat, should also be respected.
Entry to the park requires a $30 vehicle pass for seven days, or you can opt for an annual pass for $55.
With these incredible parks offering such diverse bouldering opportunities, the next step is ensuring you have the right gear and techniques to make the most of your climbing adventure.
Gear and Techniques for Bouldering
Gear Checklist
Having the right gear can make or break your bouldering experience in national parks. At the top of your list should be crash pads. These are essential for safety, and you’ll need to choose based on factors like thickness, diameter, and weight. Keep in mind that most parks don’t allow you to stash pads, so you’ll have to carry them out each day.
Your climbing shoes should match the type of rock you’ll be tackling. For example, coarse granite calls for durable rubber, while technical slabs need high-friction soles. Don’t forget to bring chalk, but make sure it adheres to the park’s specific regulations.
A few other essentials include maintenance tools like brushes, climbing tape, skin repair balm, and nail clippers. A helmet is also a smart addition to protect against rockfall or falls where you might flip backward. For wilderness areas, pack wag bags for waste, at least 2 liters of water (roughly 0.5 gallons), and sun protection like SPF sunscreen and sun-shirts.
Once your gear is sorted, it’s time to focus on the skills you’ll need for outdoor bouldering.
Bouldering Techniques
Outdoor bouldering in national parks introduces challenges you won’t encounter in indoor gyms. One key skill is mastering top-outs, which involve climbing over the top edge of a boulder. This often requires mantling – using your hands to press down and lift your body up onto the rock. Since many outdoor problems end at the summit, this move is indispensable.
Before you begin a climb, always scout your descent route to ensure you won’t get stuck at the top. Practice controlled falls on easier routes (V0–V1) to get comfortable landing feet-first on uneven terrain that may include rocks or roots.
Different rock types demand different techniques. For instance, friction climbing on coarse granite, like the monzogranite found in Joshua Tree, relies heavily on the contact between your shoe rubber and the rock surface. Meanwhile, crack climbing involves using natural fractures in the rock for hand and foot jams.
One critical rule: never climb on sandstone right after it rains. Wet sandstone becomes much weaker, which can cause holds to break and lead to dangerous falls.
Safety Tips
When spotting a climber, always keep your hands up with your fingers closed in a “spoons” position rather than “forks.” This reduces the risk of finger injuries while guiding a falling climber onto the pad. Continuously monitor the climber’s potential fall line and adjust the crash pads as needed.
Before starting a climb, inspect for hazards like loose rock or bad weather conditions. It’s important to remember that the National Park Service doesn’t inspect or maintain fixed climbing gear or bolts, so your safety is entirely your responsibility.
Finally, over 90% of surveyed boulderers agree that following Leave No Trace principles is essential for protecting the environment.
With the right gear, skills, and safety practices, you’ll be well-prepared for a rewarding bouldering experience in national parks.
Planning Your Bouldering Trip
Permits and Park Rules
Planning a bouldering trip requires more than checking off permits – timing and park-specific rules are just as important. Permit requirements differ significantly depending on the park, so make sure to do your homework before heading out. For instance, Yosemite National Park doesn’t require permits for day bouldering or climbs completed in a single day. Similarly, Rocky Mountain National Park doesn’t mandate day-use permits, but keep in mind that wilderness rules prohibit stashing crash pads anywhere in the park. On the other hand, Capitol Reef National Park requires free day-use permits for all bouldering. These can be obtained by emailing care_permits@nps.gov with your name, zone, and vehicle details for each day of your visit. At Arches National Park, climbers are encouraged to register for a free permit at self-registration kiosks. This helps park rangers monitor usage and improve safety.
Seasonal closures are another key consideration. Many areas close between January and August to protect nesting raptors or preserve sensitive sites. For overnight trips, permits are usually required across all parks but are often free for climbing-specific use.
Once you’ve sorted out the permits, it’s time to focus on choosing the best season for your trip.
Best Seasons for Bouldering
Timing your trip around the seasons can make or break your bouldering experience. For Yosemite, May and October are ideal, offering pleasant weather and fewer crowds. Spring is particularly stunning, with active waterfalls and crisp air enhancing your climbing days. Joshua Tree shines in February and March, though winter nights can be freezing, and high winds are common. In Rocky Mountain National Park, July and August are perfect for accessing high-elevation bouldering spots above 10,000 feet. If you’re looking for quieter trails, September is a great option after Labor Day, but be prepared for afternoon thunderstorms throughout the summer.
Desert parks like Capitol Reef can be challenging in summer, with temperatures often climbing into the upper 90s°F, making climbing uncomfortable and potentially hazardous. For high-altitude parks like Rocky Mountain, altitude sickness is a genuine concern – about 25% of visitors experience symptoms above 8,000 feet. To adjust, follow a 72-hour acclimation plan and avoid strenuous activity on your first day. If you’re visiting during peak times and can’t secure a timed entry permit, plan to arrive before 5 a.m. or after 6 p.m. for areas like Bear Lake.
Packing and Transportation
Once permits are secured and the timing is set, packing smart and ensuring reliable transportation will keep your trip running smoothly. Use durable duffle bags (40–90 liters) with backpack straps for easy handling during flights and transfers. Most airlines accept crash pads as checked sports equipment, but always double-check size and weight limits before booking. Packing cubes are a great way to separate climbing gear from other essentials, saving you time when you’re at the crag.
When moving through wilderness areas, carry your crash pad instead of dragging it to avoid damaging vegetation and delicate soil crusts. Beyond your core bouldering gear, don’t forget essentials like a headlamp for early starts or late finishes, sunblock for high-altitude UV exposure, and wag bags for waste management in protected areas like Rocky Mountain National Park. Layering is key for unpredictable mountain weather – pack quick-dry base layers, a fleece mid-layer, and a waterproof shell. Even in summer, snow can linger in high-altitude parks until mid-July, so be ready for cooler conditions.
Conclusion
Bouldering in national parks combines incredible climbing opportunities with breathtaking natural beauty. But enjoying these spaces comes with a responsibility: protecting them for future generations. Over 90% of surveyed boulderers agree that following Leave No Trace principles is crucial for safeguarding these environments. Every climber’s actions play a role in keeping these areas open and unspoiled.
To do your part, follow park rules and guidelines. Always secure permits when required – like the free day-use permits at Capitol Reef National Park – and respect seasonal closures. Carry out all your gear and waste, including human waste, using tools like wag bags. Avoid dragging crash pads, as this can damage delicate vegetation and biological soil crusts. And never leave gear stashed overnight; not only can wildlife damage your equipment, but it can also create dangerous debris.
"The impacts of your actions may seem insignificant, but when multiplied by the thousands of people who climb every year they can have a significant, long lasting effect." – National Park Service
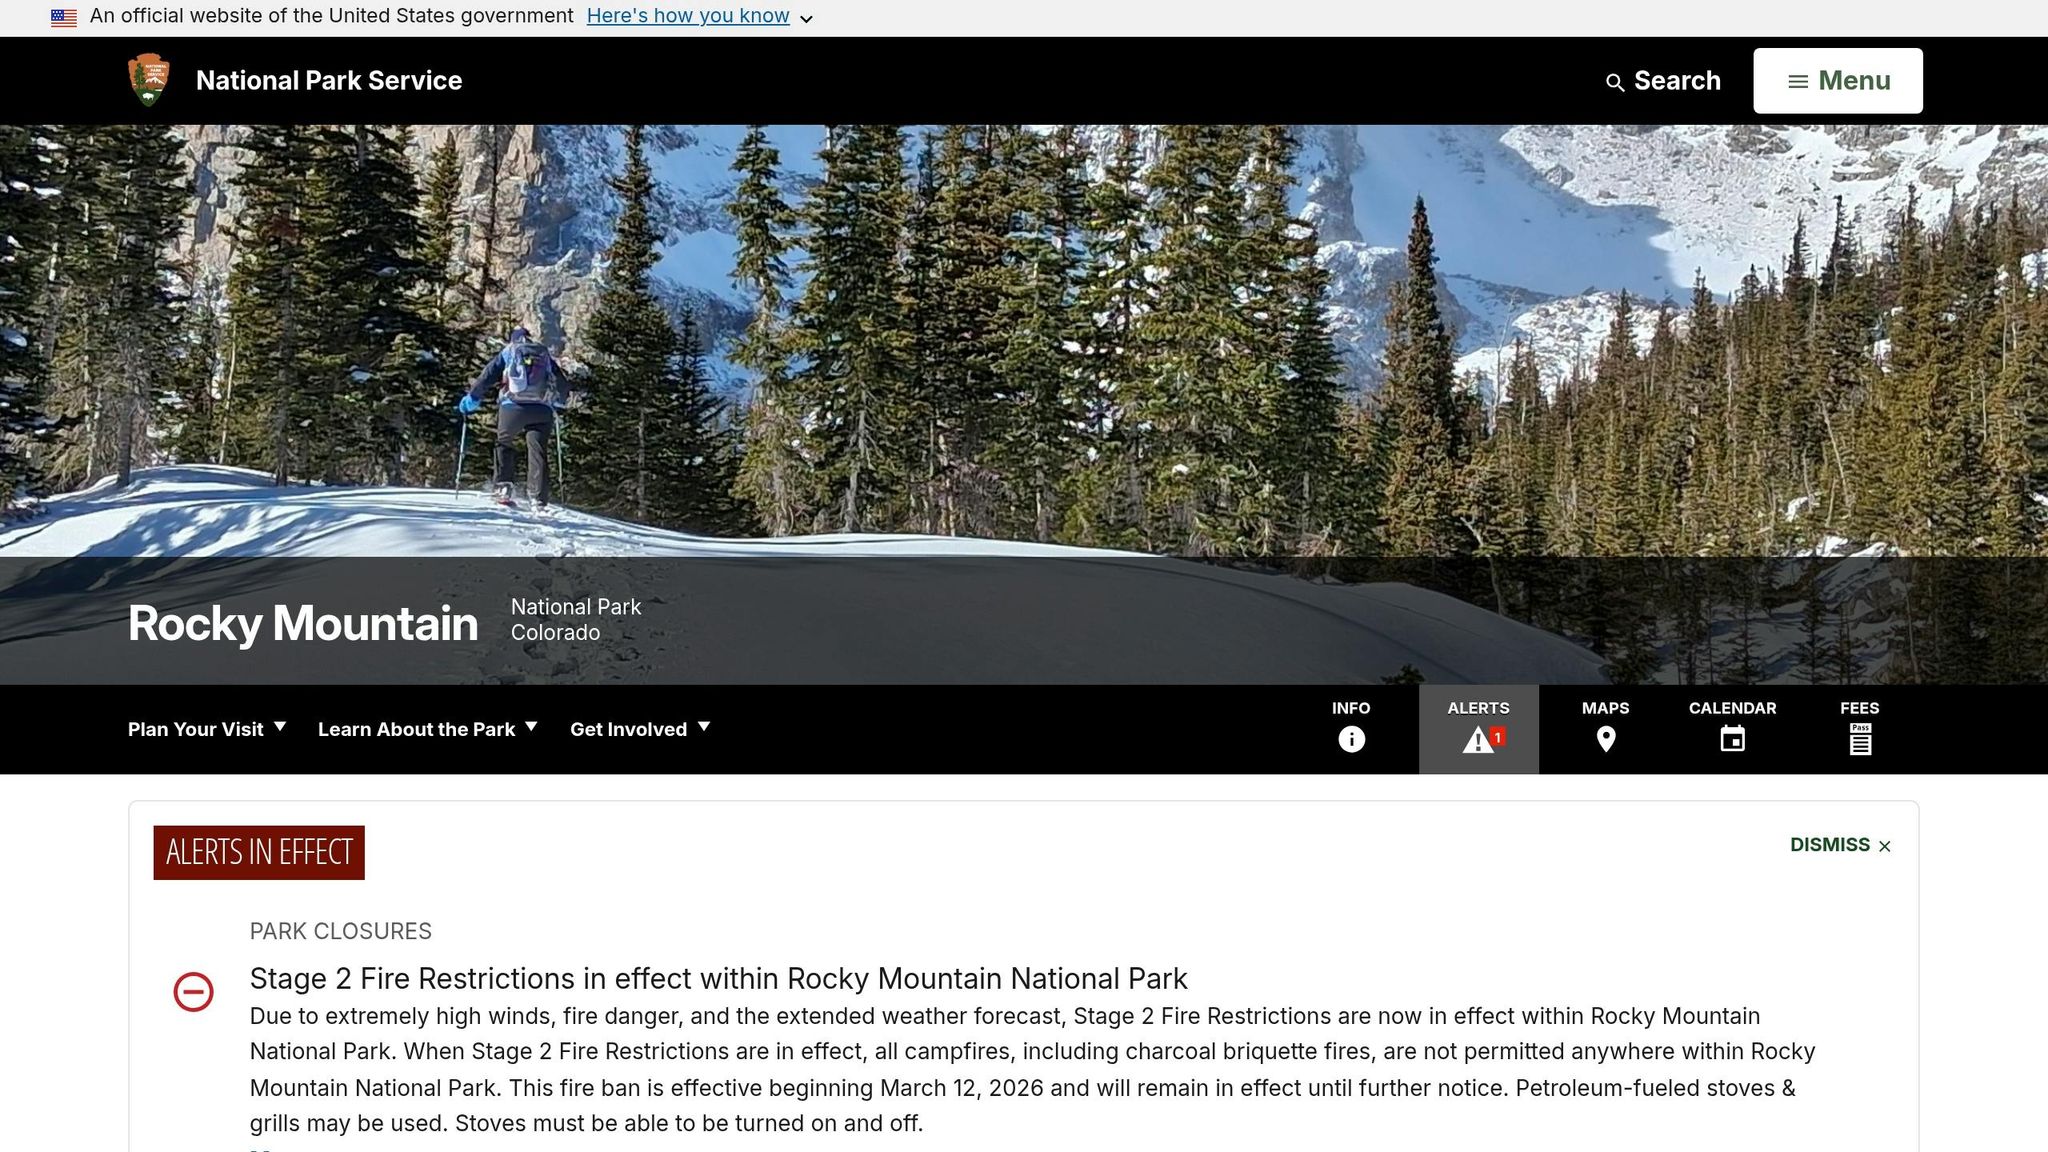
Even small efforts make a difference. Brush off chalk and tick marks after climbing, stay on established trails to prevent erosion, and resist the urge to modify rocks or engage in "gardening". Before heading out, check for park alerts, as conditions can change – like the Stage 2 Fire Restrictions currently in effect at Rocky Mountain National Park starting March 12, 2026.
FAQs
How do I find legal bouldering areas in a national park?
For accurate details on legal bouldering spots and regulations, consult official National Park Service (NPS) resources. Parks like Rocky Mountain and Arches often share specific guidelines about bouldering and climbing. Make sure to confirm designated areas, adhere to park rules, and steer clear of restricted zones – especially in wilderness areas – to keep your activities lawful and eco-friendly.
What’s the safest way to set up crash pads and spotters outdoors?
When setting up crash pads for outdoor bouldering, safety is key. Make sure the pads completely cover the landing area, lie flat, and are stable. Overlap them slightly to eliminate any gaps where a foot or hand could slip through. Before placing the pads, check the area for debris, water, or obstacles, and clear them out.
Spotters play an equally important role in safety. They should stay close to the climber, focus on guiding falls toward the pads, and avoid attempting to catch the climber directly. Clear communication and staying alert are crucial for minimizing the risk of injuries during a climb.
How can I prevent altitude sickness when bouldering in Rocky Mountain?
To minimize the risk of altitude sickness while visiting Rocky Mountain National Park, it’s important to take some precautions. Start by spending time at lower elevations to help your body adjust before heading higher. Make sure to drink plenty of water – around three liters a day – and avoid drinking too much alcohol, as it can worsen dehydration. Take it slow during your first days at higher altitudes to give your body time to adapt.
Keep an eye out for symptoms like headaches, dizziness, or nausea, which could signal altitude sickness. If these symptoms worsen, it’s best to descend to a lower elevation as quickly as possible. With the right preparation and attention to your body’s signals, you can enjoy a safer and more enjoyable bouldering adventure in the park.