
Camping in a national park is one of the best ways to experience nature. But it takes preparation to make it enjoyable and safe. Here’s a quick guide to help you plan:
- Book Early: Campsites at popular parks like Yosemite and Zion fill up 4–6 months in advance on Recreation.gov. Use tools like "Available This Weekend" for last-minute options.
- Choose the Right Campground: Developed campgrounds offer amenities like toilets and water, ideal for beginners. Primitive sites are more rugged and require extra preparation.
- Get Permits for Backcountry Camping: Many parks require permits for backcountry stays to ensure safety and protect the environment.
- Invest in Good Gear: A quality tent, sleeping bag, and cooking gear are essential. Test everything before your trip.
- Pack Layered Clothing: A moisture-wicking base layer, insulating mid-layer, and waterproof outer layer keep you comfortable in changing weather.
- Check Park Rules: Each park has unique regulations for fires, food storage, and camping. Review these on the park’s website.
- Train and Practice: Build up your fitness for hikes and practice setting up your tent and using camping gear.
- Bring Navigation Tools: Carry a map, compass, and GPS. Backup communication devices like a satellite messenger are critical in remote areas.
- Plan Water and Distance: Aim for 5–10 miles of hiking per day and plan water needs carefully. Carry a filter or purification tablets.
- Follow Bear Safety Rules: Store food in bear lockers or canisters to protect wildlife and yourself.
Camping in Zion National Park | Best Options and How to Get a Site
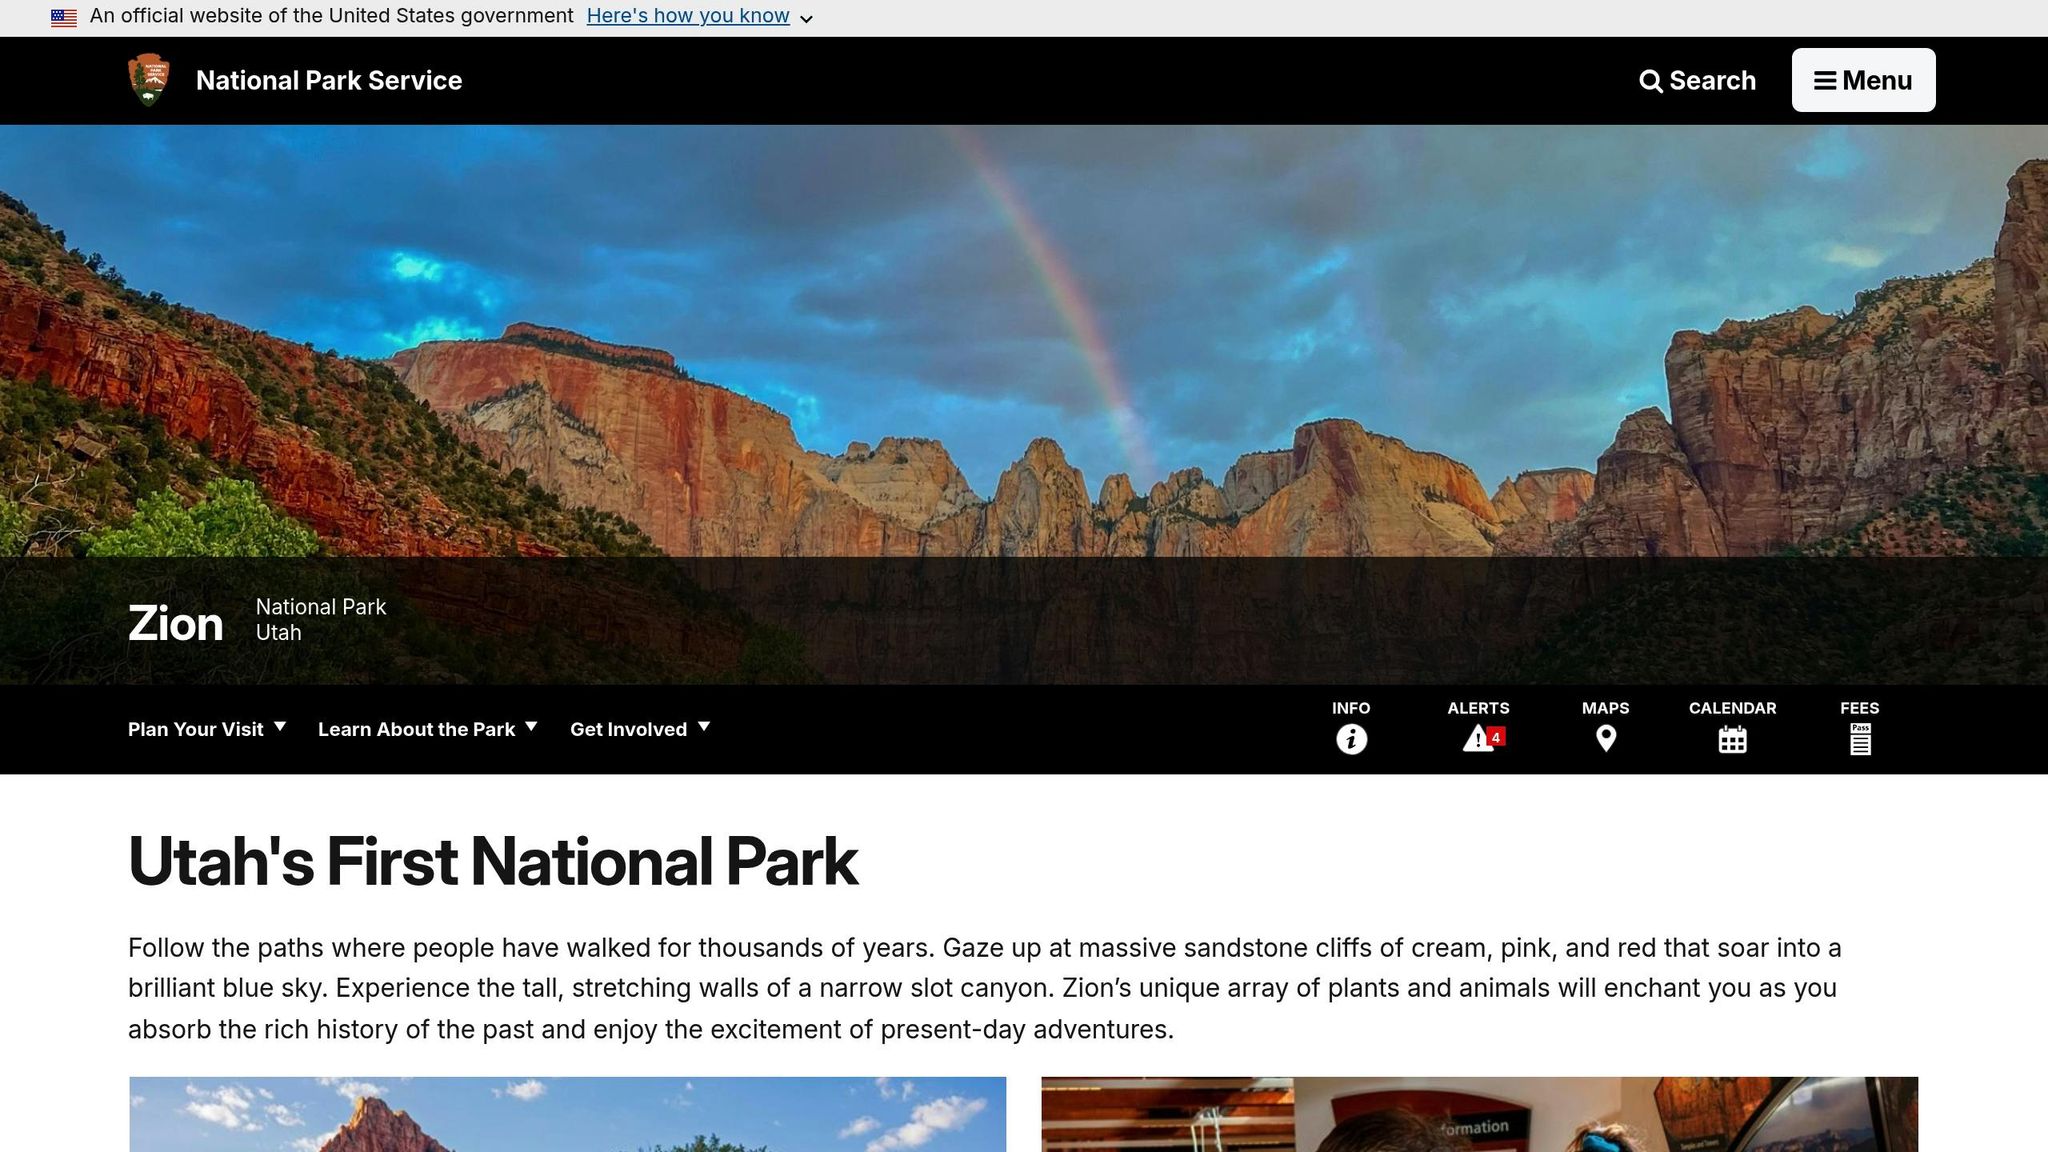
1. Book Your Campsite 4–6 Months Early
Planning ahead is key when it comes to snagging a campsite at popular national parks. These sought-after spots tend to fill up fast, so aim to book as soon as reservations open – typically 4–6 months in advance. For iconic parks like Yosemite, Zion, and Glacier, setting a calendar reminder for the booking date can make all the difference.
Recreation.gov is your go-to platform for securing campsites, offering access to over 3,600 facilities and 103,000 sites across the country. In November 2025, parks like Acadia, Grand Canyon, Joshua Tree, Mount Rainier, and Zion were listed among its "Most Popular Locations." If your preferred dates are unavailable, consider shifting your trip to the quieter shoulder seasons, such as spring or fall, when crowds thin out and availability improves.
For last-minute plans, Recreation.gov’s "Available This Weekend" feature can be a lifesaver. While these openings might not be in the most famous parks, they often lead to hidden gems in National Forests or lesser-known recreation areas.
Don’t limit yourself to just national parks. Recreation.gov also covers National Forests and other federal lands, which often have more availability and can provide equally rewarding outdoor adventures. Use the website’s search tools to explore options by state or activity – you might stumble upon an incredible destination you hadn’t considered before.
2. Know the Difference Between Developed and Primitive Campgrounds
If you’re new to camping in national parks, understanding the differences between developed and primitive campgrounds is crucial for picking the right spot. These two options differ significantly in terms of amenities and the level of preparation required.
Developed campgrounds are perfect for beginners and families, offering a more comfortable and accessible camping experience. These sites typically include amenities like picnic tables, fire rings, tent pads, designated parking areas, and bear lockers for safely storing food. You’ll also find bathrooms – flush or pit toilets – and, in some parks, even showers, laundry facilities, or general stores for added convenience.
One of the biggest perks of developed campgrounds is the ease of access. You can usually drive directly to your campsite, making it simple to unload your gear. Popular national parks like Yellowstone, Grand Teton, Yosemite, and Grand Canyon feature excellent frontcountry sites with these comforts. On the other hand, primitive campgrounds offer a more stripped-down, rustic experience.
Primitive campgrounds provide only the basics, which can include pit toilets, fire pits, benches, parking spaces, and bear lockers. However, they usually lack potable water and other conveniences. These sites require campers to be more self-reliant and prepared to manage with limited facilities.
When planning to camp at a primitive site, check the size of the tent pads ahead of time. Some may be too small for larger or multiple tents. Recreation.gov is a helpful resource for checking dimensions, and reviews from other campers can provide additional insights.
| Feature | Developed Campgrounds | Primitive Campgrounds |
|---|---|---|
| Toilets | Flush toilets (usually) | Pit toilets |
| Water | Potable water available | Limited or none |
| Amenities | Picnic tables, fire rings, showers, laundry (in some parks) | Fire pits, benches, basic facilities |
| Infrastructure | Tent pads, parking, bear lockers | Tent pads, parking, bear lockers |
| Best For | Beginners, families | Experienced campers |
| Self-Sufficiency | Minimal preparation needed | Greater preparation required |
If you’re just starting out, developed campgrounds are a great way to ease into camping. They let you enjoy the outdoors without sacrificing too many comforts. Once you’ve gained more experience and confidence, you can challenge yourself with primitive camping – or even backcountry camping – where self-reliance becomes key.
Some national parks also offer first-come, first-served (FCFS) campgrounds as an alternative to reservable sites. For a more spontaneous trip, plan to arrive early to snag a spot.
When you arrive at your campsite, stop by the ranger station for up-to-date park information and specific rules for your site, such as occupancy limits, generator use, and fire restrictions. Understanding these differences will help you prepare for your next camping adventure and tackle new challenges with confidence.
3. Get Required Permits for Backcountry Camping
Planning to spend the night in the backcountry? You’ll need a permit to camp in these remote wilderness areas. This isn’t just a formality – it’s about ensuring safety and protecting the fragile environment.
Why are permits important? Backcountry permits help park officials keep track of visitor numbers, which is essential for preserving delicate ecosystems. They also play a key role in safety, as parks use this information to know where campers are located and their expected return dates – critical details for search and rescue operations. Additionally, permits enforce Leave No Trace principles, ensuring proper waste management in wilderness areas.
Each park has its own permit rules. Some require permits for all backcountry camping, while others might have restrictions based on zones or seasons. The application process varies too – some parks offer simple online systems, while others might still rely on phone calls or even faxes.
To get started, visit the park’s official NPS page and check the wilderness or backcountry camping section. This will outline everything you need to know about permits and how to apply. Typically, you’ll need to provide details like your travel dates, planned route, group size, and specific camping locations.
Before applying, take the time to prepare. Get topographic maps and mark your route, campsites, and water sources. Create a realistic itinerary – most parks expect hikers to cover 5–10 miles per day, depending on the terrain. You’ll also need to document your group size, participant names, and your planned start and end dates. Once ready, follow the park-specific submission process, which could involve applying online, by phone, or through the mail.
Timing matters. While frontcountry camping reservations often need to be made 6–12 months in advance due to high demand, backcountry permits can vary depending on the park and season. For popular parks during the summer, permits can go fast, so check the application window for your destination and apply as soon as it opens.
Understand permit restrictions before finalizing your plans. These might include fire regulations, waste disposal rules, and whether you’re limited to designated campsites. Many parks enforce stay limits, usually allowing camping for up to 14 days within a 30-day period, though this can differ by location. You’ll also need to pack out all human waste using proper methods, such as digging a cathole with a trowel. Fire rules may prohibit campfires entirely or require specific safety measures. Some parks allow dispersed camping, while others restrict you to designated sites.
Once you have your permit, share your itinerary with someone you trust. Let them know where you’re going, your planned route, and when you expect to return. This step is crucial in case you run into trouble. Review your permit carefully to ensure you understand all the rules and restrictions for your specific park and area. Double-check that your campsites and route match what’s listed on your permit.
If the thought of backcountry camping feels overwhelming, that’s perfectly normal. It’s a big step, and starting with developed campgrounds is a great way to build your skills. When you’re ready to venture into the backcountry, practice essential skills ahead of time, like setting up your tent, using a camp stove, and following Leave No Trace principles.
4. Buy Quality Tent Camping Gear
Getting the right gear can make or break your camping experience. It’s not just about comfort – it’s about safety and being prepared for the unexpected.
Pick the right tent. A freestanding tent with color-coded poles and a rainfly is a smart choice, making setup easier and providing reliable protection from sudden weather changes. Think about size, too – a 2-person tent might feel tight if you’re storing gear inside. For spring, summer, and fall trips to national parks, a 3-season tent strikes a good balance between weight, ventilation, and weather resistance. And don’t forget to check the tent pad dimensions to ensure everything fits comfortably.
Build a solid sleeping system. A good night’s sleep starts with the right setup: a sleeping bag, a sleeping pad, and proper shelter. Your sleeping pad isn’t just for comfort – it also insulates you from the cold ground, helping retain body heat. Down sleeping bags are lightweight and warm but lose effectiveness when wet, while synthetic bags stay warm even in damp conditions. Choose a bag rated for temperatures lower than what you expect, just to be safe. When it comes to sleeping pads, inflatable ones are lightweight and comfy, but closed-cell foam pads are more durable and straightforward.
Plan your cooking gear. For developed campgrounds with fire rings and picnic tables, you can get by with basic gear like a camp stove or a grill grate. If you’re heading into the backcountry, a lightweight, portable stove is a better option. Make sure you practice using your stove at home so you’re not fumbling with it in the field. Once your cooking setup is sorted, turn your attention to safety and navigation tools.
Don’t skimp on safety essentials. Pack a headlamp, matches or a lighter, a pocket knife, a compact first aid kit, a small repair kit (or duct tape), and a trowel for waste disposal. For navigation, download GPS and compass apps and bring a battery-operated charger as a backup.
Go green with toiletries. Help protect the environment by choosing biodegradable soap, toothpaste, and sunscreen. These eco-friendly options help keep local water sources and wildlife safe.
Check park-specific rules. Some parks have unique requirements, like bear canisters for backcountry camping. For example, Yosemite rents bear canisters for about $5 per day. Contact the park’s backcountry office ahead of time to confirm what’s needed.
Test your gear beforehand. Set up your tent in your backyard to get comfortable with the process and ensure all parts are in working order. Practice lighting your stove, using water treatment systems, and break in new hiking boots on short walks to avoid blisters on the trail.
Budget wisely. Expect to spend between $500 and $1,500 for beginner camping gear. For example, a freestanding tent typically costs $150–$400, a quality sleeping bag $100–$300, and a sleeping pad $50–$200. Not ready to commit? Renting gear is a great way to figure out what works for you before making big purchases.
For more help, check out The National Park Guide’s Packing List Generator. It tailors gear suggestions based on your destination and the season, making trip planning much easier.
Having the right gear isn’t just about ticking items off a list – it’s about ensuring your camping trip is safe, enjoyable, and stress-free. Proper preparation ties back to earlier advice about planning and permits, setting you up for a smoother adventure.
5. Pack Layered, Moisture-Wicking Clothes
Weather in national parks can change drastically in just a few hours. You might start your morning hike in brisk 40°F air, enjoy a warm 70°F midday, and then get caught in an unexpected rainstorm by afternoon. A single heavy jacket won’t cut it – you’ll need a flexible clothing system to handle these shifts. Here’s how to prepare a layering system that keeps you comfortable no matter what the park throws at you.
Master the three-layer system. The key to staying comfortable is layering smartly. Start with a moisture-wicking base layer that sits directly against your skin to keep sweat away. Add an insulating mid-layer to trap warm air close to your body – this layer can be adjusted as temperatures change. Finally, top it off with a protective outer layer that blocks wind and rain while still allowing moisture to escape. This setup keeps you warm when you’re resting and prevents overheating when you’re on the move.
Pick the right materials for your base layer. Synthetic fabrics like polyester and nylon are great for beginners. They dry quickly, perform well even when damp, and are budget-friendly. If you’re looking for something a bit more advanced, merino wool is a fantastic option – it regulates temperature naturally and resists odors. Whatever you do, skip cotton. Cotton holds onto moisture, dries slowly, and can leave you feeling cold and uncomfortable. Staying dry isn’t just about comfort – it’s a safety issue, especially in cooler weather where wet clothes can lead to a dangerous drop in body temperature.
Layer smartly. Start with a moisture-wicking base layer, such as a synthetic or merino wool shirt and leggings. Add a fleece or lightweight down jacket for insulation. Finally, finish with a waterproof or water-resistant shell jacket and pants to shield you from wind and rain. This combination allows you to adjust your layers easily as the weather changes.
Pack strategically for multi-day trips. If you’re heading out for several days, pack 2–3 base layers, one mid-layer, a waterproof shell, versatile hiking and camp pants, and warm socks. To save space, roll your clothes instead of folding them, and wear your bulkiest items while traveling. Choose neutral colors for easy mixing and matching, and look for pieces that can serve multiple purposes – like a fleece jacket that doubles as a standalone layer on warmer days.
Adapt to your destination’s climate. Different parks call for different strategies. High-elevation spots like Rocky Mountain or Grand Teton National Parks can have frosty nights – even in summer – so pack heavier insulation. On the other hand, desert parks like Death Valley or Joshua Tree experience extreme swings between scorching days and cool nights, so you’ll need both lightweight and warm layers. Check the park’s website for current weather conditions and seasonal patterns before you go.
Take care of your clothes on the trail. After a long day, rinse your base layers in cool water and hang them in the shade to air-dry. If your trip lasts several days, rotating between multiple base layers ensures you’ll always have a dry set ready to wear.
With a well-thought-out layering system, you’ll stay comfortable and prepared for any weather during your national park adventure. The right clothing choices make all the difference, letting you focus on the beauty around you instead of worrying about the elements.
6. Review Park Websites for Rules and Current Conditions
Once you’ve booked your campsite and prepped your gear, the next step is diving into the specific rules of your chosen park. Each national park has its own set of regulations, and what’s acceptable at Yellowstone might be completely off-limits at Joshua Tree. Fire restrictions, waste disposal rules, campsite guidelines, and food storage protocols can differ greatly from one park to another. Skipping this research could lead to unexpected fines, safety risks, or even a canceled trip if you encounter unexpected trail closures or permit requirements. Taking the time to check these details ensures your adventure is both safe and compliant.
Start with the park’s official website. The National Park Service website (nps.gov) is your best resource. Navigate to your park’s page and look for sections like "Wilderness and Backcountry Camping" or simply "Camping". These pages provide essential information on fire rules, waste disposal protocols, and campsite-specific regulations. Since park rules can vary widely and often change based on conditions, always consult the page for your specific destination. Don’t assume all parks operate under the same guidelines – this step is crucial.
Stay up-to-date on fire restrictions. Fire regulations can shift quickly, especially during dry seasons or wildfire-prone periods. Parks usually post current fire restrictions on their websites, ranging from allowing fires only in designated rings to complete fire bans during high-risk times. Summer, in particular, tends to bring stricter rules. If you’re heading into the backcountry, double-check these restrictions before you go. Ignoring them can lead to hefty fines and endanger both you and the park’s ecosystem.
Check the "Alerts and Conditions" section frequently. Beyond fire safety, this section covers updates like trail closures, road conditions, weather warnings, and wildlife activity. Reviewing these alerts a week or two before your trip – and again just days before you leave – helps you stay informed about any last-minute changes that could impact your plans.
Pay attention to wildlife alerts. Wildlife warnings are more than just interesting updates – they directly impact your safety and planning. For example, increased bear activity might require you to use bear-proof lockers or canisters for food storage. Parks also issue alerts about mountain lion sightings, seasonal migrations, or mating seasons, all of which can influence where you camp and how you store your supplies. These warnings help you avoid potentially dangerous encounters.
Check seasonal facility updates. Knowing which facilities are open or closed can make a big difference. Bathrooms, water stations, and visitor centers often operate on seasonal schedules. Some campgrounds may close entirely in winter, while others stay open but with reduced services. Water availability is another key factor – streams that flow in the spring might dry up by late summer.
Contact the local Ranger District for real-time updates. While park websites are a great starting point, calling the local Ranger District or Field Office can give you the most current information. Rangers can provide updates on fire restrictions, road closures, camping limits (like the common 14-day stay limit in a 30-day period), and areas where camping might be restricted. This direct line of communication is especially helpful for last-minute questions.
Use a staged timeline for reviews. Plan your research in phases: check general park information 6–12 months in advance, review regulations 3–6 months out, monitor alerts 2–4 weeks before your trip, and confirm details one week prior to departure. This method keeps you informed and allows for adjustments if conditions change. Arriving prepared ensures your trip goes as smoothly as possible.
sbb-itb-00512f3
7. Get in Shape and Practice Camping Skills Beforehand
Camping, especially in remote areas or at higher elevations, demands more than just packing the right gear – it requires physical preparation. Whether you’re tackling rugged trails with a loaded backpack or setting up camp at a developed site, being in good shape can make the difference between a trip full of struggles and one you’ll actually enjoy. Along with planning and gear prep, building your fitness and practicing essential camping skills are key steps to a smoother experience.
Start training 6–12 weeks in advance. Give yourself a head start by preparing your body for the demands of camping. Start with shorter hikes – 2 to 3 miles – while carrying a 10-pound pack. Gradually increase the distance to 4–5 miles, and eventually work up to longer hikes of 6–10 miles with 25–30 pounds on your back. Include trails with elevation gain to mimic the terrain you’ll face. Even moderate endurance – like comfortably hiking 3–5 miles uphill – can make a huge difference in your trip.
Train on terrain that matches your destination. If you’re heading to a park with steep trails, training on flat sidewalks or treadmills won’t cut it. Find hilly or uneven paths to practice on, and use this time to adjust your backpack for comfort. Testing your gear in realistic conditions ensures you’re ready when it matters most.
Practice setting up your tent. Before heading out, take the time to practice pitching your tent in different conditions. Try it in your backyard or at a local park, and focus on building muscle memory. Freestanding tents with color-coded poles are great for beginners, as they’re easier to set up, even on uneven ground.
Get comfortable with your camping stove. Cooking outdoors can be tricky, especially in the dark or cold. Practice lighting your stove, adjusting the flame, and turning it off safely. Test your stove with the meals you plan to cook on your trip to understand how much fuel you’ll need and how your stove handles different cooking tasks.
Do a trial camping trip close to home. Spend a night or two at a nearby campground or state park. Set up your tent, cook meals, and sleep in your gear just as you would on your actual trip. This trial run will help you figure out what’s essential and give you confidence in your camping setup.
Hone other critical skills. If your destination requires bear canisters, practice using them. Test your water filter, brush up on map-and-compass navigation, and try using a headlamp during low-light conditions. Wear your layered, moisture-wicking clothing on practice hikes to see how it performs.
Be honest about your fitness level. Start with a simple test: hike 2–3 miles on flat terrain with a light pack. Pay attention to how your body feels – if you’re winded or experiencing joint pain, start with gentler training. If needed, consult a healthcare provider to ensure you’re ready to increase your activity level safely.
Prepare for altitude challenges. Many national parks sit at elevations above 8,000 feet, where the air is thinner and physical activity feels harder. If you’re coming from sea level, train on hilly terrain and plan to arrive a day or two early to acclimate.
8. Carry Navigation Tools and Backup Communication Devices
When you’re exploring the wilderness of national parks, relying solely on your smartphone for navigation isn’t a safe bet. Cell service is often unreliable or completely unavailable in these remote areas. Getting lost isn’t just an inconvenience – it can quickly become a serious safety issue. That’s why having proper navigation tools and backup communication devices is essential for staying on track and calling for help if needed.
Bring at least three navigation tools: a topographic map, a compass, and a GPS device or a smartphone with offline maps downloaded. Each tool serves a unique purpose. A paper map won’t fail you because of dead batteries, a compass works even when GPS signals are spotty, and a GPS device provides real-time location data. If you’re new to navigating, start with a map and compass, and once you’re comfortable, add a GPS to your toolkit. Having multiple options ensures you’re prepared for any situation.
Prepare your maps before heading out. You can pick up topographic maps at the park’s visitor center or download them online. Before your trip, mark your planned route, campsites, water sources, and emergency exits. Pay attention to trail junctions, elevation changes, and distance markers. Familiarize yourself with map symbols and contour lines, and leave a copy of your marked route with someone you trust. Include your expected return date and emergency contact information.
Learn to use your map and compass together. Practice orienting your map with your compass and drawing a bearing line to your destination. These skills are invaluable when trails become unclear. It’s a good idea to practice at home or on local trails before relying on these tools during your trip.
Stop at the ranger station when you arrive. Maps provided by the park often include the latest updates on trail conditions, closures, and hazards – details that generic maps might miss. Rangers can also provide guidance on trail difficulty, water availability, and weather conditions, helping you plan your route more effectively. Combining these maps with your topographic maps gives you a well-rounded understanding of the terrain.
While navigation tools help you find your way, communication devices are your lifeline in emergencies. Pack a backup communication device for remote areas. Satellite messengers like Garmin InReach allow two-way communication and location sharing without relying on cell towers. These devices typically cost between $300 and $600, with monthly subscription fees ranging from $10 to $30. Personal locator beacons (PLBs) are another option, designed solely for emergency alerts to search and rescue teams. PLBs usually cost $200 to $400 and don’t require ongoing fees. Satellite phones offer voice communication but are heavier and more expensive, with rental rates of $5 to $15 per day or purchase prices between $500 and $1,500. If you’re an occasional camper, renting a satellite messenger or PLB might be a more budget-friendly choice.
Factor in weight and battery life when selecting devices. Most satellite devices weigh between 4 and 8 ounces and have a battery life of 7 to 14 days. Check coverage maps for your destination in advance, as some areas may have dead zones where satellite signals won’t work. For short-range group communication, two-way radios are a reliable option, typically working within 1 to 5 miles depending on the terrain.
Keep your navigation tools accessible. Store your map and compass in a waterproof case and keep them on your person, not buried in your backpack. Program emergency contacts into your satellite messenger or phone, and know the locations of ranger stations and shelters along your route. Plan check-in times with someone you trust, and have a clear strategy for what to do if you get lost – stay put, use your communication device, and wait for rescue.
Download offline maps before losing cell service. It’s a common mistake to rely on GPS without downloading maps in advance. Break your trip into manageable segments with clear waypoints, and use conservative time estimates for your hikes to avoid misjudging distances or your pace.
Practice your navigation skills before you need them. Take a navigation course through outdoor organizations or the National Park Service, and practice using your map and compass on day hikes in familiar areas. If you’re new to backcountry adventures, consider hiring a guide or sticking to well-marked trails in developed campgrounds for your first trip. Building confidence in your navigation abilities ensures a safer and more enjoyable experience in the wilderness.
For more navigation tips and up-to-date trail maps, check out the Trail Finder tool on The National Park Guide website.
9. Set Realistic Daily Distances and Water Plans
Pushing yourself too hard on the trail can lead to exhaustion, so setting achievable daily mileage goals is key. Match your targets to your fitness level and the conditions of the trail. If you’re just starting out, aim for 5 to 10 miles per day on moderate terrain. For steeper climbs or heavier packs, scale back your expectations. A good rule of thumb: add about 0.5 miles for every 1,000 feet of elevation gain. On flat sections, you might cover 2 to 3 miles per hour, while moderate terrain typically slows you to 1 to 2 miles per hour, and steep or technical trails might limit you to 0.5 to 1 mile per hour.
Before your trip, take a few practice hikes with a fully loaded backpack to understand your pace and comfort level. Ideally, start training 4 to 8 weeks in advance, combining aerobic activities like hiking, running, or cycling with 2 to 3 strength-training sessions per week. This preparation will help you build endurance and reduce the risk of fatigue or injury.
Just as important as managing your distance is planning for water. On average, you’ll need 2–3 liters (0.5–0.8 gallons) per day, but in hot weather, high altitudes, or during strenuous hikes, increase that to 3–4 liters. For hikes of 5 to 10 miles, carrying 2 to 3 liters should suffice if water sources are available along the way. However, always pack an extra liter as a safety measure.
Before heading out, study park maps, guidebooks, and the National Park Service website to identify reliable water sources on your route. Download offline maps or carry printed versions showing these locations. Seasonal changes can impact water availability, so check with the park’s backcountry office for the latest updates. Some parks may have water caches or stations along popular trails, but these aren’t always guaranteed to be full or ready to use.
Invest in a dependable water filtration system for peace of mind. A portable squeeze filter, priced around $20–$40, is lightweight and effective against bacteria and protozoa. Carry purification tablets as a backup. Boiling water works too but requires extra fuel, while pump filters, though effective, are heavier and cost between $50 and $100.
Plan water breaks every 1–2 hours or every 2–3 miles to refill and rest. In hot or high-altitude conditions, consider taking a longer midday break – around 30 to 45 minutes – to rehydrate and recharge.
To maximize daylight for setting up camp, start your hikes early. Keep your daily distances slightly below your maximum capability to give yourself flexibility if the weather turns, fatigue sets in, or an injury occurs. Identify alternate campsites or bailout points, such as ranger stations or trail junctions, ahead of time.
If you’re staying at developed campgrounds without potable water, bring a multi-gallon water container (typically 2 to 5 gallons) to store water for cooking, cleaning, and drinking. This will save you from making frequent trips to the water source.
10. Follow Bear Canister and Food Storage Rules
When you’re out camping, proper food storage isn’t just a suggestion – it’s a must for keeping both you and the local wildlife safe. Bears are naturally curious, and the smell of food, toiletries, or even trash can lure them to campsites. Once they associate human areas with easy meals, it often leads to dangerous encounters, which may force park officials to take drastic measures.
In developed campgrounds, you’ll typically find metal bear lockers at individual campsites. These lockers are designed to securely store food and any scented items when you’re away or asleep. It’s crucial to use them consistently – every single scented item should go inside. Common mistakes, like leaving the locker door open while packing, setting items out "just for a second", or keeping food in your tent overnight, can significantly increase the risk of a bear encounter.
For backcountry camping, a portable bear canister is essential. Many parks with active bear populations, such as Yosemite, Glacier, and the Grand Canyon, require these canisters as part of your permit conditions. If you don’t own one, parks like Yosemite offer rentals for about $5 per day, making a week-long trip cost roughly $20–$35. If you’d rather buy your own, expect to spend between $60 and $150, depending on the size and brand.
Everything with a scent – food, toiletries, cooking utensils, and even trash – should be stored in your bear canister. Bears have an incredible sense of smell, far stronger than a bloodhound’s, and can detect food odors from long distances. Even items like cooking gear that seem clean but retain food residue should go in the canister.
When using a bear canister, make sure it’s approved by the park you’re visiting. Pack heavier items at the bottom and lighter ones on top. At your campsite, place the canister at least 100 feet away from your tent and cooking area, ideally downwind. Never sleep too close to it or leave it unattended without securing it properly. Following these steps is crucial for a safe and enjoyable camping experience.
Ignoring food storage rules can lead to serious consequences. Parks may issue fines, revoke your permit, or even press criminal charges. More importantly, improper storage can habituate bears to humans, putting both visitors and wildlife at risk.
Before heading out, check the park’s official website or contact the backcountry office to review the latest food storage rules. Planning your trip 4 to 6 months in advance will give you enough time to rent or purchase the right equipment.
If you encounter a bear near your food storage, stay calm. Back away slowly while keeping the bear in sight, and report the incident to park rangers right away. Make yourself appear larger by raising your arms and speaking in a firm, steady voice. Never run – this could provoke a chase. And if the bear gets to your items, don’t try to retrieve them. Let the bear leave and notify park authorities immediately.
Developed vs. Primitive Campgrounds Comparison
Deciding between developed and primitive campgrounds comes down to your experience, comfort needs, and how much infrastructure you prefer. Each option offers a distinct way to enjoy the outdoors, with differences in amenities, costs, and the skills required. Here’s a detailed look at what sets them apart.
Developed campgrounds are perfect for beginners or anyone who values convenience. These sites are vehicle-accessible, meaning you can drive right up to your spot and unload your gear without breaking a sweat. Most offer essential facilities like flush toilets, potable water stations, and sometimes even showers or laundry services. Many also include general stores for last-minute supplies or firewood. Bear lockers are provided, so you don’t need a personal bear canister. Fire rings make campfires easy to manage, and centralized waste disposal eliminates the need to pack out trash or human waste. Popular destinations like Yellowstone, Yosemite, Grand Teton, and the Grand Canyon feature excellent developed campgrounds, making them a solid choice for first-time campers or those seeking comfort and ease.
Primitive campgrounds, on the other hand, strip camping down to its basics. Amenities are minimal, often limited to pit toilets or none at all. Potable water isn’t available, so you’ll need to bring your own or purify water from natural sources using tablets or filtration devices. Access is typically more challenging – many primitive sites require hiking or backpacking to reach, and parking may be limited or nonexistent. While these sites offer more freedom in tent placement, they demand strict adherence to Leave No Trace principles to protect the environment.
Camping at primitive sites requires a higher level of preparation and self-reliance. You’ll need to pack a bear canister for food storage, navigation tools, water purification gear, and possibly a headlamp since there’s no ambient lighting. Fire restrictions are often stricter, and regulations can change depending on the season or location, so it’s essential to check current conditions before heading out.
| Feature | Developed Campgrounds | Primitive Campgrounds |
|---|---|---|
| Accessibility | Drive-up access (car/RV) | Often requires hiking/backpacking |
| Toilets | Flush toilets (usually) | Pit toilets or pack-out systems |
| Water | Potable water available | Must bring or purify water |
| Amenities | Picnic tables, fire rings, showers/laundry (sometimes) | Minimal to none |
| Bear Storage | Bear lockers provided | Personal bear canisters required |
| Skill Level | Beginner-friendly | Intermediate to advanced |
| Cost | Nightly fees (varies by park) | Often free or minimal cost |
The reservation process also differs significantly. Developed campgrounds often require early reservations through platforms like Recreation.gov, sometimes up to 6–12 months in advance. Some also have first-come, first-serve sections, but you’ll need to arrive early to secure a spot. Primitive camping on National Forest and BLM lands usually doesn’t require reservations and is often free, though you’ll need to research and follow local rules, which can vary widely.
When booking a developed site, pay attention to tent pad dimensions. They can vary greatly, and some are surprisingly small. If you’re bringing a large tent or multiple tents, check specific measurements on Recreation.gov to avoid surprises.
For beginners, developed campgrounds are the ideal starting point. The infrastructure simplifies the experience, allowing you to focus on learning basic skills without worrying about advanced tasks like water purification or navigation. Once you’re comfortable, transitioning to primitive camping can offer a more rugged and immersive wilderness experience, though it requires more preparation and gear.
Cost is another factor to consider. Developed campgrounds charge nightly fees, while primitive camping on National Forest and BLM lands is often free. However, the savings can be offset by the need for specialized equipment like bear canisters, water purification systems, and navigation tools. Be aware that many national forests impose a 14-day stay limit within a 30-day period for dispersed camping.
Before heading out, confirm current rules with local authorities. Park websites on the National Park Service (NPS) site provide detailed backcountry regulations, which can vary by location and season. Staying informed ensures you’re prepared and helps you make the most of your camping experience. This research complements earlier tips on gear, safety, and setup, making it an essential step in planning your trip.
Conclusion
Embarking on your first tent camping trip in a national park can feel overwhelming, but with thoughtful preparation, it becomes an experience you’ll treasure. Start by reserving your campsite early on Recreation.gov to secure your spot. Familiarize yourself with park-specific rules on the National Park Service website, obtain any required backcountry permits, and invest in reliable gear suited to the season and location.
Once your plans are set, prioritize safety and preparation. Store food securely using bear canisters to protect both yourself and wildlife. Carry navigation tools and backup communication devices for emergencies, and plan daily hiking distances of 5–10 miles, adjusting for the terrain. Always share your itinerary and expected return date with someone you trust. Essentials like a first aid kit, a headlamp, and water purification tools are must-haves, especially when staying at primitive campgrounds with minimal facilities.
Each park has its own regulations regarding fires, waste disposal, and backcountry camping, so check with the local ranger district before heading out. Tailor your trip to your experience level – start with developed campgrounds before advancing to more remote sites as your confidence grows.
For additional help with planning, visit The National Park Guide. This resource offers free guides, tools like the Custom Trip Planner and Weather Checker, and real-time updates on park closures and events. By combining careful planning, safe practices, and respect for park guidelines, your national park camping adventure promises to be both safe and memorable. With the right preparation, you’ll create lasting memories in some of the most breathtaking landscapes the U.S. has to offer.
FAQs
What’s the difference between developed and primitive campgrounds, and how do I choose the best option for my trip?
Developed campgrounds come with conveniences like restrooms, running water, picnic tables, and sometimes even electricity or Wi-Fi. These spots are perfect for campers who enjoy a bit more comfort, making them a great choice for families or those just starting out.
Primitive campgrounds, however, strip things down to the basics. Often lacking running water or restrooms, they offer a more rugged, nature-focused experience. These are best suited for seasoned campers who crave solitude and a deeper connection with the outdoors.
When deciding between the two, think about your comfort level, experience, and the kind of adventure you’re after. If you’re new to camping or have kids in tow, a developed campground might be the way to go. For a quieter, more remote escape, primitive camping could be your answer. Just be sure to review the specific rules and requirements for the campground you plan to visit, as these can vary from park to park.
How should I plan for water needs during a camping trip in a national park, especially for long hikes?
Planning your water needs is a must when camping or hiking in national parks. Start by checking if the park offers potable water, like refill stations or natural sources that might need filtering. Always pack enough water to cover your activities, aiming for at least half a gallon per person per day. Keep in mind, you’ll need more if you’re hiking in hot weather or at higher altitudes.
If you’re heading out on longer hikes, a lightweight water filter or purification tablets can be a lifesaver for treating water from streams or other natural sources. To make things easier on the trail, consider hydration packs or collapsible water bottles – they’re space-efficient and convenient for sipping as you go. Staying hydrated is non-negotiable, so keep an eye on how much you’re drinking and refill every chance you get.
What safety precautions can I take to avoid bear encounters while camping in national parks?
To reduce the chances of running into a bear while camping, here are some key safety measures to keep in mind:
- Store your food securely: Use bear-resistant containers or hang your food at least 10 feet above the ground and 4 feet away from any tree trunk. Never bring food or scented items inside your tent.
- Maintain a tidy campsite: Dispose of trash in bear-proof bins and avoid leaving food scraps, dirty dishes, or cooking gear out in the open.
- Stay aware of your surroundings: Watch for bear signs like tracks or droppings, and make noise while hiking to avoid startling a bear.
If you happen to encounter a bear, stay calm. Don’t run – this might trigger the bear to chase you. Instead, slowly back away while keeping your eyes on the bear, and speak in a steady, firm tone. Having bear spray on hand and knowing how to use it can add an extra layer of protection.