
If you’re heading to Rocky Mountain National Park for photography, this 3-day guide ensures you’ll hit the park’s most stunning locations at the right times for the best light. With over 415 square miles of alpine landscapes, 60 peaks above 12,000 feet, and abundant wildlife, this park is a dream for photographers. Here’s what you need to know:
- Key Spots: Trail Ridge Road, Dream Lake, Alberta Falls, Sprague Lake, and Moraine Park.
- Timed Entry Permits: Required from May 22 to October 12, 2026. Permits cost $2 per vehicle and can be reserved on Recreation.gov.
- Best Times for Photography: Sunrise for soft light and wildlife, and mornings for alpine landscapes (before afternoon storms roll in).
- Gear Checklist: Wide-angle lens (16–35mm), telephoto lens (70–200mm or longer), tripod, polarizing filter, and layers for variable weather.
Day Highlights:
- Day 1: Drive Trail Ridge Road for sunrise views and alpine tundra photography.
- Day 2: Hike to Alberta Falls, photograph wildlife in Moraine Park, and catch sunset at Dream Lake.
- Day 3: Start with sunrise at Sprague Lake, then visit Bear Lake and other scenic spots.
Plan ahead, pack wisely, and arrive early to make the most of your time in this breathtaking park.
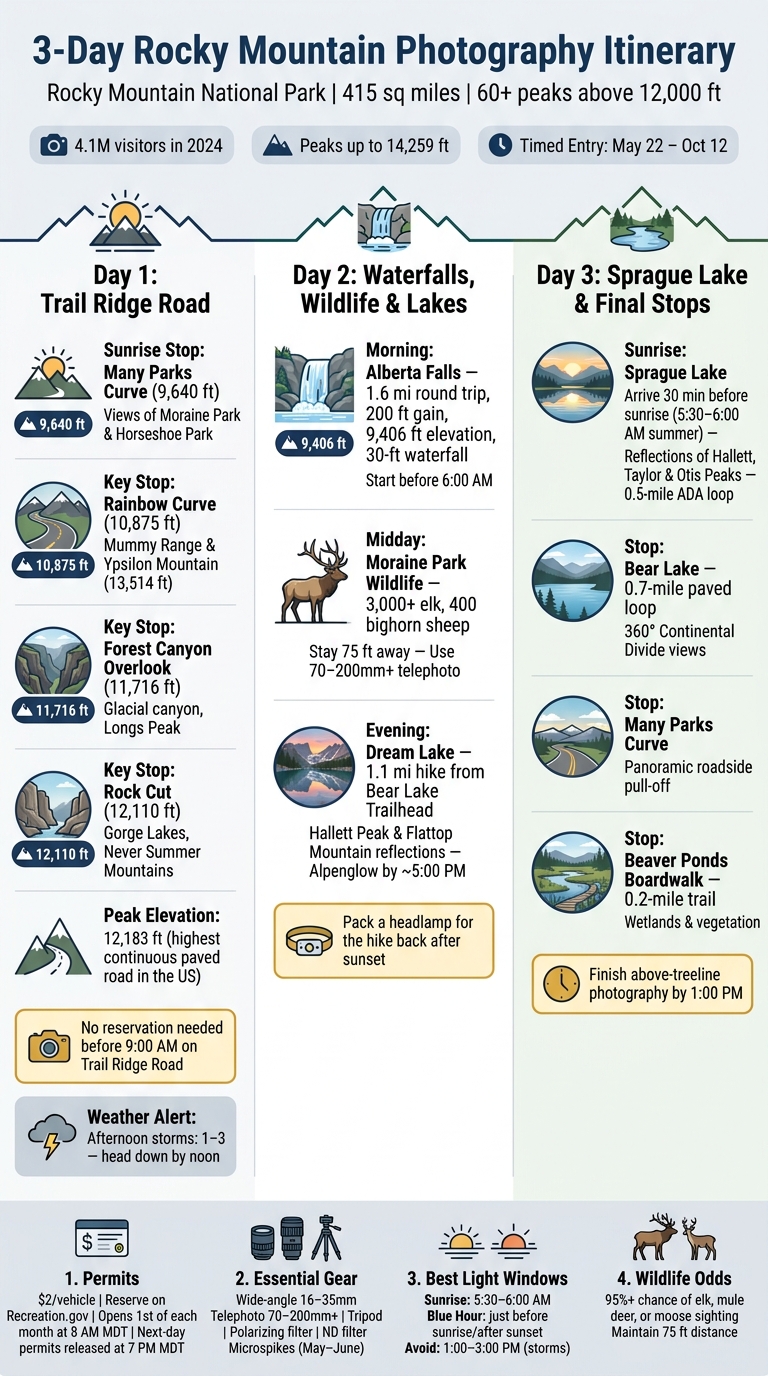
Rocky Mountain National Park: 3-Day Photography Itinerary at a Glance
Is it worth it? Searching for light in Rocky Mountain National Park
What to Know Before You Go
Getting ready for your trip to Rocky Mountain National Park is just as important as knowing your camera settings. With over 4.1 million visitors in 2024, the park can get busy, so planning ahead will save you time and frustration. From understanding the entry system to packing the right gear, preparation ensures you’re ready to capture every breathtaking scene. These tips work perfectly with daily itineraries to help you make the most of your photography adventure.
Seasonal Access and Entry Reservations
From May 22 through mid-October 2026, the park operates a two-tiered timed entry system. Your permit choice depends on where you plan to shoot.
| Permit Type | Access Area | Reservation Hours | Season End |
|---|---|---|---|
| Timed Entry + Bear Lake Road | Entire park, including Bear Lake Road Corridor (Dream Lake, Sprague Lake, Moraine Park) | 5:00 AM – 6:00 PM | October 19, 2026 |
| Timed Entry (Standard) | All areas except Bear Lake Road (Trail Ridge Road, Wild Basin) | 9:00 AM – 2:00 PM | October 13, 2026 |
Permits cost $2 per vehicle (non-refundable) and can be reserved on Recreation.gov. Reservations open on the first of each month at 8:00 AM MDT for the following month. If you miss out, a limited number of next-day reservations are released at 7:00 PM MDT the evening before. Each reservation comes with a 2-hour entry window, but once you’re in, you can stay as long as you’d like.
For sunrise photography, you can access the Bear Lake Road Corridor before 5:00 AM without a reservation. Other areas allow entry before 9:00 AM without one. Don’t forget to download offline maps ahead of time – cell service is unreliable, especially on Trail Ridge Road and in Wild Basin. These steps will help you hit the ground running for your 3-day photography plan.
Photography Gear to Bring
To make the most of your shots, pack a wide-angle lens (16–35mm) for sweeping alpine landscapes and a telephoto lens (70–200mm or longer) for wildlife. The odds of spotting elk, mule deer, or moose are incredibly high (95%+), so be ready for those moments. A circular polarizing filter is also a must for reducing glare on lakes and enhancing the color of skies.
Rocky Mountain National Park’s high-altitude trails can be physically demanding, and conditions vary widely. Even in May and June, trails may still have ice or snow, so bring microspikes or crampons and waterproof boots. Dress in layers to handle the dramatic temperature swings between the valleys and the alpine tundra. A sturdy tripod is essential for capturing low-light scenes like blue hour reflections, and a red headlamp will help you set up in the dark without ruining your night vision.
Best Light Conditions and Timing Tips
Golden hour – the period just after sunrise and before sunset – provides warm, directional light that enhances the textures of the mountains. For a cooler, moodier look, shoot during the blue hour, which occurs just before sunrise and after sunset. Reflective alpine lakes look particularly stunning during this time.
For high-altitude photography, mornings are your best bet. Summer afternoons often bring fast-moving thunderstorms, usually between 1:00 PM and 3:00 PM. As Chuck Price, a Resource Guide Author, advises:
“Above treeline, weather changes fast, and afternoon storms are common. Start Alpine days early.”
Dawn and dusk aren’t just great for light – they’re also prime times for wildlife activity. Plus, calmer winds during these hours help you capture sharper images with less camera shake.
Day 1: Trail Ridge Road and Alpine Views
Trail Ridge Road holds the title of the highest continuous paved road in the United States, peaking at an impressive 12,183 feet above sea level. Spanning 48 miles, with 11 of those miles above the treeline, this route offers some of the most breathtaking alpine landscapes imaginable. Day 1 is all about making the most of the early light and exploring the unique opportunities this iconic drive provides throughout the day.
Sunrise at Trail Ridge Road
Since Trail Ridge Road is outside the Bear Lake Road Corridor, you can access it before 9:00 AM without needing a timed entry reservation. Arriving early not only ensures you catch the golden morning light but also helps you avoid crowds. Keep in mind, temperatures at the higher elevations can be 20 to 30°F cooler than in Estes Park, so dressing in layers is a must.
Kick off your day with a stop at Many Parks Curve (9,640 ft), roughly 10 miles from Estes Park. This overlook offers stunning views of Moraine Park, Horseshoe Park, and Beaver Meadows, all illuminated by the soft morning glow. From there, head to Rainbow Curve (10,875 ft), where you’ll be treated to vistas of the Mummy Range, Alluvial Fan, Ypsilon Mountain (13,514 ft), and Hagues Peak. As Horace Albright, a former Director of the National Park Service, once said:
“You will have the whole sweep of the Rockies before you in all directions.”
Wildlife is most active during sunrise, so keep your eyes peeled for elk, mule deer, and bighorn sheep grazing in the area. Afterward, continue along the road to explore more scenic overlooks.
Top Scenic Stops Along the Route
As you ascend, the landscape transitions from dense subalpine forests to the vast, open alpine tundra. Be sure to stop at these key overlooks along the way:
| Overlook | Elevation | Highlights |
|---|---|---|
| Many Parks Curve | 9,640 ft | Views of Moraine Park, Horseshoe Park, and Longs Peak |
| Rainbow Curve | 10,875 ft | Mummy Range, Alluvial Fan, Ypsilon Mountain, and Hagues Peak |
| Forest Canyon | 11,716 ft | A stunning glacial canyon with Longs Peak towering above |
| Rock Cut | 12,110 ft | Gorge Lakes, Never Summer Mountains, wildlife, and unique rock formations |
| Gore Range | 12,048 ft | Sweeping views of the Never Summer Mountains and alpine tarns |
At Forest Canyon Overlook (11,716 ft), you’ll find an incredible spot for wide-angle shots, with Longs Peak beautifully framed by the glacial canyon. Moving on to Rock Cut (12,110 ft), the tundra fully opens up, offering views of the Gorge Lakes, Never Summer Mountains, and fascinating rock formations like Mushroom Rocks. This is also a great area for spotting wildlife.
Midday Photography Tips for Trail Ridge Road
After capturing the soft hues of sunrise, use the strong midday light to focus on the intricate details of the alpine environment. The Tundra Communities Trail, near Rock Cut, is home to around 200 species of alpine wildflowers. These resilient blooms thrive during a short growing season, typically from June to July, making them a fantastic subject for close-up photography.
Take a break at the Alpine Visitor Center (11,796 ft), the highest visitor center in the National Park System. It’s a great place to grab a snack, rest, and prepare for the afternoon. Be mindful of the weather – afternoon thunderstorms are common at this elevation and can roll in quickly. These storms, however, can create dramatic lighting as the clouds break, offering a striking contrast to the soft tones you captured earlier. Stay close to your vehicle for safety during lightning, but have your camera ready to capture these fleeting, powerful moments.
Day 2: Waterfalls, Lakes, and Wildlife
After soaking in sweeping alpine vistas, Day 2 shifts focus to the finer details of nature – waterfalls, wildlife, and tranquil lakes. Your camera will capture everything from rushing water to serene sunsets, so get ready to explore with your reservation in hand.
Morning: Hike to Alberta Falls
Kick off your day early at the Glacier Gorge Trailhead, aiming to start your hike before 6:00 AM to avoid the crowds. The short 1.6-mile round trip with a modest 200-foot elevation gain leads to Alberta Falls, sitting at an elevation of 9,406 feet.
This stunning waterfall plunges 30 feet through a granite chute, offering plenty of opportunities for dramatic photography. Position yourself at the base to frame the cascading water with surrounding boulders and fir trees. For a fresh perspective, carefully navigate nearby rock slabs for close-up shots. A wide-angle lens (16–35mm) works best to capture the entire scene.
If you’re aiming for that silky, smooth water effect, bring a sturdy tripod and use a neutral density (ND) filter to slow your shutter speed to 1–2 seconds. A polarizing filter is also handy to reduce glare on wet rocks and enhance the colors of the foliage. Be cautious near the spray zone, as the rocks can be slippery. Late spring, when snowmelt is at its peak, brings the falls to life with even more energy.
Once you’ve captured the falls, head to Moraine Park to photograph the park’s abundant wildlife.
Midday: Wildlife Viewing in Moraine Park
Moraine Park is a haven for wildlife photography, with its open meadows providing an ideal backdrop. Rocky Mountain National Park is home to over 3,000 elk and nearly 400 bighorn sheep. As noted by Roads and Destinations:
“A wide meadow with a dense forest in the background is the primary location to watch and… photograph wildlife in Rocky Mountain.”
While midday sunlight can be harsh, focus on animals resting in the shade where the meadow meets the tree line. A telephoto lens (70–200mm or longer) is essential for capturing close-up shots without disturbing the animals. Remember to maintain a safe distance – park rules require staying at least 75 feet away from elk and bighorn sheep. If an animal reacts to your presence, back off immediately.
Patience is key here. Choose a spot, stay quiet, and let the wildlife come to you. With some luck, you’ll capture striking images of these majestic creatures in their natural habitat.
Evening: Sunset at Dream Lake
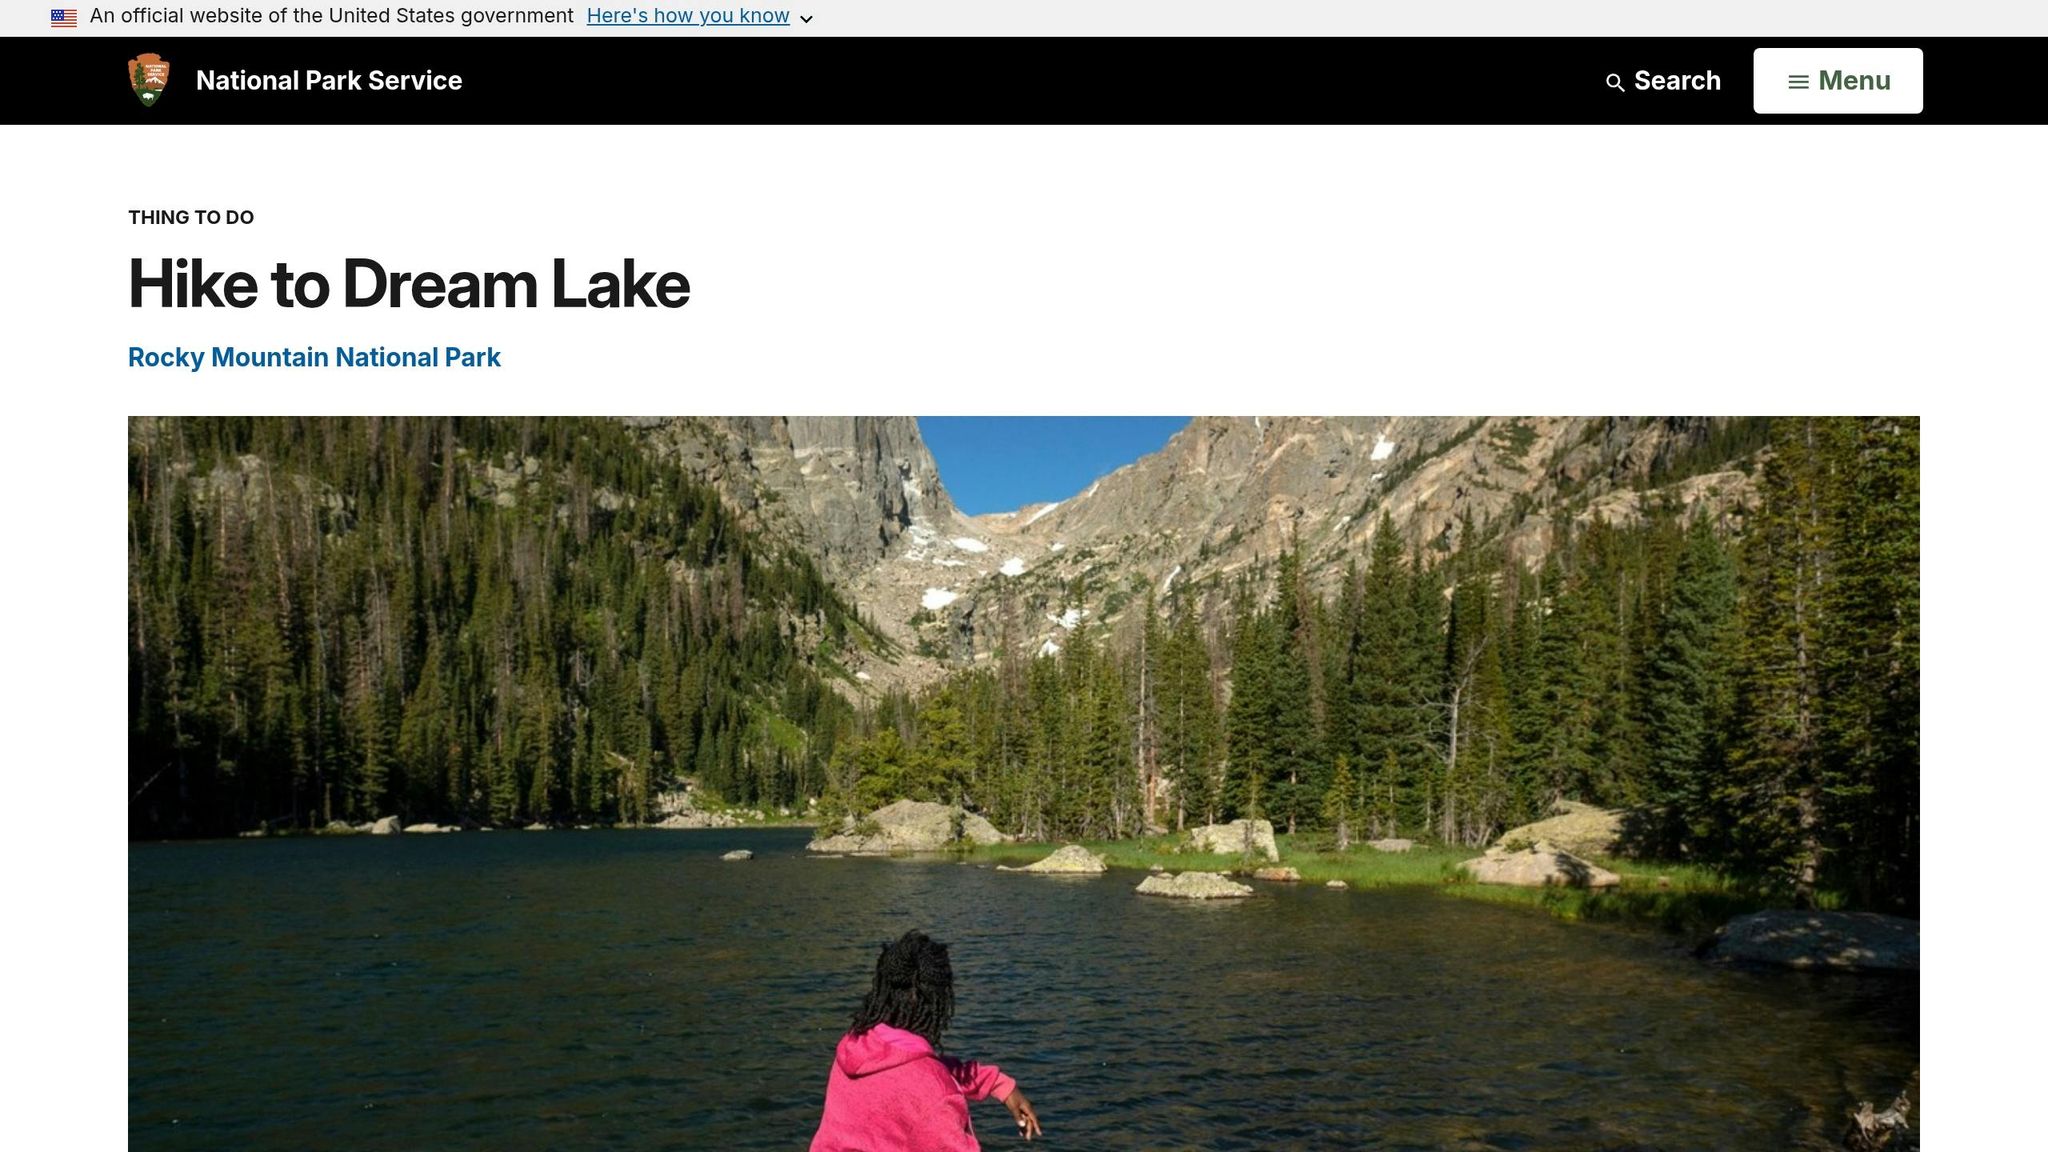
Wrap up the day with a peaceful sunset at Dream Lake, a short 1.1-mile hike from the Bear Lake Trailhead. Nestled beneath Hallett Peak and Flattop Mountain, Dream Lake offers breathtaking views. As Lisette Kent describes:
“The definitive composition at Dream Lake involves placing the mirror-like surface of the lake in the foreground with Hallet Peak and Flattop Mountain rising directly behind.”
The best vantage point is along the eastern shore, facing west. The surrounding peaks block direct sunlight by around 5:00 PM, creating a soft alpenglow on Hallett Peak’s east face. This glow is especially vivid during autumn and early spring. Use an f/8 aperture for sharpness throughout the frame and manually adjust your white balance to preserve the warm tones of the scene.
Don’t forget to pack a headlamp for your hike back, as you’ll be descending after dark. It’s the perfect way to end a day filled with nature’s beauty.
sbb-itb-00512f3
Day 3: Sunrise at Sprague Lake and Final Stops
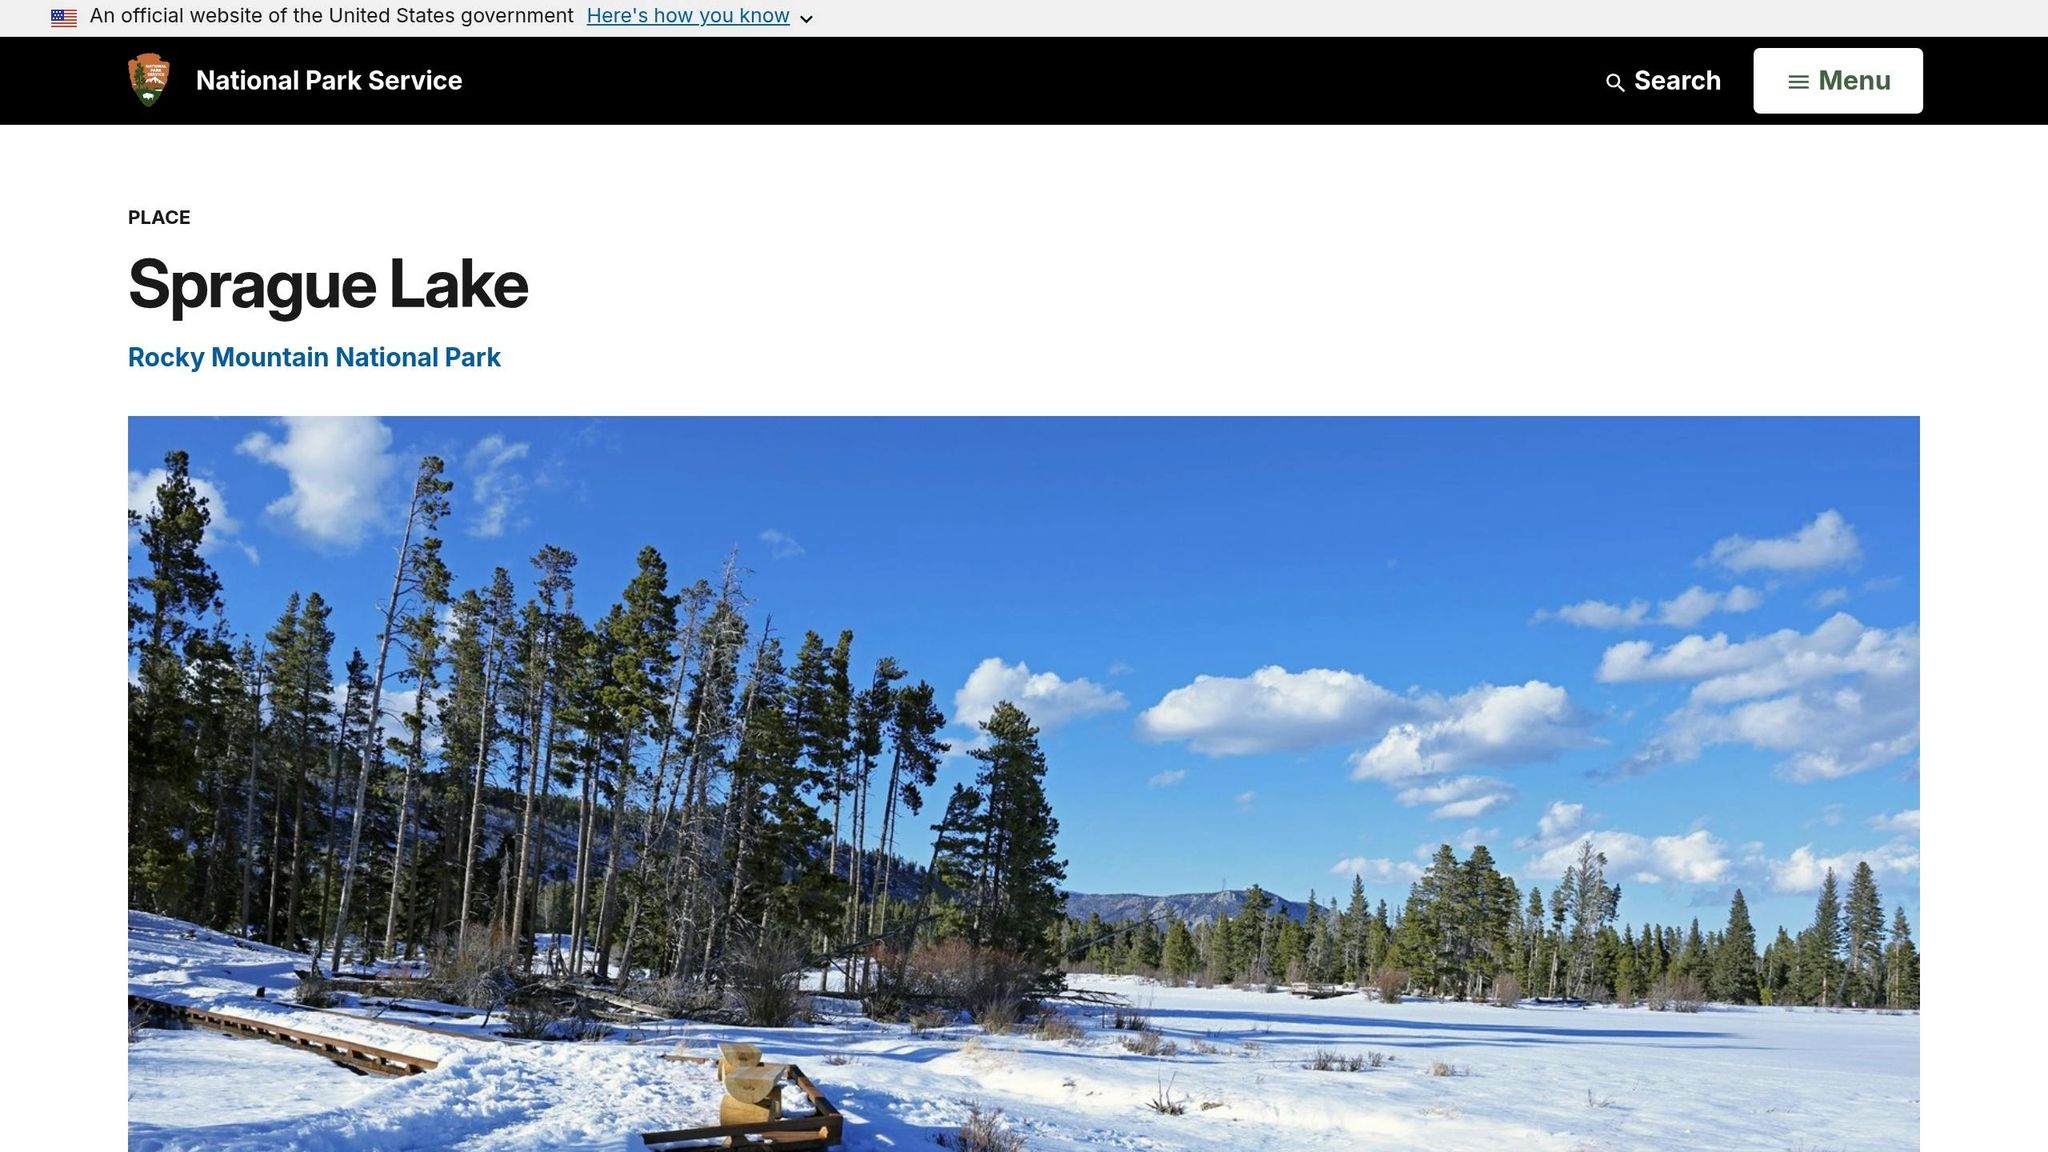
Day 3 of your photography adventure is all about serene moments and iconic views. Start your morning with a peaceful sunrise at Sprague Lake, followed by a few more scenic stops to round out your trip.
Sunrise at Sprague Lake
Plan to arrive at Sprague Lake at least 30 minutes before sunrise – the parking lot fills up quickly. During the summer, sunrise typically happens between 5:30 AM and 6:00 AM. Keep in mind that from May 22 to October 18, you’ll need a “Timed Entry + Bear Lake Road” reservation unless you arrive before 5:00 AM, which allows you to skip the reservation requirement.
The east side dock is the go-to spot for photographers. From here, you can capture beautiful reflections of Hallett Peak, Taylor Peak, and Otis Peak in the calm waters. As From the Hip Photo puts it:
“The light hits the peaks first, painting them in warm gold and pink tones while the lake is still glassy and calm.”
After shooting at the dock, explore the 0.5-mile ADA-accessible loop trail. For another great angle, head to the far-end bridge. Chris & Sara recommend this spot, noting:
“For the best spot, head to the far end near the bridge, which offers an unobstructed view of the lake and the surrounding mountains.”
The lighting changes quickly during sunrise, so have your tripod ready and consider using a polarizer to cut down on glare. Keep an eye out for wildlife like moose and elk along the shoreline – they’re most active in the early morning.
Final Scenic Stops Around the Park
Once the sunrise show is over, take advantage of the nearby Bear Lake Road corridor to capture more stunning views. Bear Lake is a short drive away and offers a 0.7-mile paved loop with breathtaking, 360-degree views of the Continental Divide. It’s perfect for wide-angle compositions and doesn’t require a strenuous hike.
Before wrapping up your trip, make a quick stop at Many Parks Curve. This roadside pull-off provides sweeping panoramic views that are ideal for one last photo session.
For additional variety, consider the Beaver Ponds Boardwalk. This 0.2-mile trail features wetlands and lush vegetation, giving you opportunities for unique nature shots.
| Location | Key Feature | Access |
|---|---|---|
| Sprague Lake | Sunrise mountain reflections | 0.5-mile ADA loop |
| Bear Lake | 360-degree Continental Divide views | 0.7-mile paved loop |
| Many Parks Curve | Final panoramic overlook | Roadside pull-off |
| Beaver Ponds Boardwalk | Wetlands & vegetation shots | 0.2-mile boardwalk |
Aim to finish your outdoor photography by 1:00 PM to avoid the afternoon storms that often roll in.
Photo Planning Tips for the Rocky Mountain Region
Packing for High-Altitude Weather Changes
Essentials for your 3-day adventure
In the Rocky Mountain region, elevations range from 7,800 to 14,259 feet. This means you can experience rapid weather shifts – from warm and sunny to cold and snowy – sometimes within minutes, even in the middle of summer.
To stay comfortable, wear wool or synthetic layers topped with a windproof outer shell. Skip cotton, as it loses its ability to insulate when wet. Don’t forget high-SPF sunscreen and a hat since the sun’s rays are much stronger at higher altitudes. Also, hydration is critical – plan on carrying 3–4 liters of water per person each day to combat dehydration.
If you’re visiting between May and late June, icy patches can still persist on popular trails, so pack microspikes. For photographers, a polarizing filter is a must – it reduces glare on alpine lakes and enhances blue skies in ways that editing software can’t quite match.
Making the Most of Your Time at Each Location
To maximize your time, focus on high-elevation photography early in the morning. Be sure to finish any shoots above the treeline by 1:00 PM to avoid the afternoon thunderstorms that often roll in. If you notice clouds gathering over the Continental Divide, head to lower elevations and shift your attention to waterfalls or forest trails.
Trailhead parking along Bear Lake Road fills up fast, sometimes even before sunrise. The park’s seasonal shuttle system can save you time and stress, making it easier to move between locations.
“Arrive at least 45 minutes before sunrise to secure your spot and set up your gear. Use a wide-angle lens to capture the full scene, and a polarizing filter to reduce glare on the water.” – William Stanek, Photographer
By planning your timing wisely, you’ll set yourself up to capture each location at its most photogenic moment.
Picking the Right Locations for the Best Light
Once you’ve nailed your timing, choosing the right spot is key to taking advantage of the best light. Here’s a quick guide to lighting conditions for some of the region’s standout locations:
| Location | Best Time | Primary Subject |
|---|---|---|
| Trail Ridge Road | Late afternoon | Alpine tundra and distant peaks |
| Bear Lake | Sunrise | Hallett Peak reflections |
| Sprague Lake | Sunrise | Panoramic mountain reflections |
| Moraine Park | Sunset/golden hour | Grazing elk and meadow vistas |
| Dream Lake | Early morning | Hallett Peak and clear water |
| Many Parks Curve | Sunrise | Sweeping valley views |
While midday light can be harsh, it’s great for capturing high-contrast shots or highlighting rocky textures. Alternatively, seek out shaded areas like the birch forests near Glacier Gorge for softer lighting. And if the weather turns unexpectedly, check the National Park Service’s “Current Conditions” page for updates on road closures or other alerts before heading out on a high-altitude drive.
Conclusion: Plan Your Rocky Mountain Photography Trip
A carefully planned three-day adventure in the Rocky Mountains can result in breathtaking photos. By keeping track of permits, parking, and timing, you’ll set yourself up to capture the best moments while avoiding unnecessary hassles.
First, make sure to secure a timed entry permit through recreation.gov before your trip. It’s a small fee but essential, especially during peak season. Remember, parking at popular spots like Bear Lake and Glacier Gorge fills up by 7:30 AM. Trail Ridge Road, rising to 12,183 feet, offers dramatic views, but summer storms are common between 1:00 PM and 3:00 PM, so plan accordingly.
With over 350 miles of trails, early mornings are your best friend. Spots like Sprague Lake and Bear Lake provide incredible reflections at dawn, while golden hour transforms Moraine Park and Forest Canyon into magical landscapes.
For more information on access, seasonal tips, and logistics, check out The National Park Guide at thenationalparkguide.com. Be sure to review guidelines and pack your gear thoughtfully for a photography trip you’ll never forget.
FAQs
Which timed entry permit do I need for this 3-day plan?
If you’re planning a visit between May 22 and mid-October 2026, you’ll need a timed entry permit for peak hours. You have two options:
- Timed Entry + Bear Lake Road Permit: Grants access to the entire park, including the Bear Lake Road Corridor.
- Standard Timed Entry Permit: Allows access to all park areas except the Bear Lake Road Corridor.
No reservation? You can still explore most areas before 9 a.m. or after 2 p.m., and the Bear Lake Road Corridor before 5 a.m. or after 6 p.m.
What backup photo spots work best if Trail Ridge Road closes?
If Trail Ridge Road isn’t an option, the Bear Lake Road corridor is a fantastic substitute. Accessible year-round, this area includes breathtaking spots like Bear Lake, Sprague Lake, and Moraine Park meadow. Even in the colder months, you’ll find striking scenery, frozen lakes, and a chance to spot wildlife. While the lower elevations might be snowy or brisk, they’re still easy to reach and offer plenty of photo opportunities without venturing into high-altitude terrain.
How can I avoid crowds at Bear Lake and Glacier Gorge?
If you want to dodge the crowds, plan to arrive before 5:00 a.m. or after 6:00 p.m., when timed entry reservations aren’t needed. Keep in mind, parking spots fill up quickly – usually by 7:00 a.m. – so getting there early is essential if you’re driving. Another option? Take advantage of the free Park & Ride shuttle to skip the parking hassle altogether. For a more peaceful visit, think about going during the shoulder seasons or even in the winter months when things are much quieter.