
Yosemite National Park offers a variety of hiking trails, ranging from easy walks to challenging climbs, with stunning views of waterfalls, granite peaks, and alpine meadows. Whether you’re a beginner or an experienced hiker, there’s something for everyone. Here’s a quick overview of the top hikes:
- Mist Trail: Iconic waterfalls like Vernal and Nevada Falls. Moderate to strenuous, depending on how far you go.
- Upper Yosemite Falls Trail: A tough climb to North America’s tallest waterfall with sweeping valley views.
- Half Dome: A challenging 14-16 mile hike requiring permits and good fitness, with a cable-assisted final ascent.
- Bridalveil Fall Trail: A short, easy walk to a 620-foot waterfall.
- Lower Yosemite Falls Trail: A 1-mile paved loop offering close views of the lower falls.
- Four Mile Trail: A steep path to Glacier Point with incredible vistas of Yosemite Valley.
- Taft Point & Sentinel Dome Loop: A moderate loop with panoramic views and dramatic cliff edges.
- Mirror Lake Trail: Easy to moderate, featuring reflections of Half Dome and seasonal water levels.
- Mono Pass Trail: A peaceful high-altitude trail with alpine meadows and granite landscapes.
Quick Comparison
| Trail Name | Difficulty | Distance (Round Trip) | Elevation Gain | Key Highlights | Best Season |
|---|---|---|---|---|---|
| Bridalveil Fall Trail | Easy | 0.5 miles | Minimal | 620-ft waterfall | Year-round |
| Lower Yosemite Falls Trail | Easy | 1.0 mile | Minimal | Base of 320-ft fall | Spring/Early Summer |
| Mirror Lake Trail | Easy/Moderate | 2–5 miles | Minimal | Reflections of Half Dome | Spring/Early Summer |
| Mist Trail (Vernal Falls) | Moderate | 3.0 miles | 1,000 ft | Waterfall spray and scenic footbridge | Spring/Early Summer |
| Mist Trail (Nevada Falls) | Strenuous | 5.4 miles | 2,000 ft | Stunning waterfall views | Spring/Early Summer |
| Upper Yosemite Falls Trail | Strenuous | 7.2–7.4 miles | 2,700 ft | Valley panoramas and Yosemite Falls | Spring/Early Summer |
| Four Mile Trail | Strenuous | 9.6 miles | 3,200 ft | Glacier Point views | Late Spring to Fall |
| Taft Point & Sentinel Dome | Moderate | ~5.0 miles | ~1,000 ft | Panoramic views and cliff edges | Late Spring to Fall |
| Mono Pass Trail | Moderate | ~8.0 miles | ~1,000 ft | Alpine meadows and high-altitude landscapes | Summer/Early Fall |
| Half Dome | Very Strenuous | 14–16.2 miles | 4,600–4,830 ft | Steel cable ascent with summit panorama | Summer/Early Fall |
Spring is ideal for waterfalls, while summer and early fall are better for high-elevation trails. Always plan ahead, carry enough water, and check trail conditions before starting your hike.
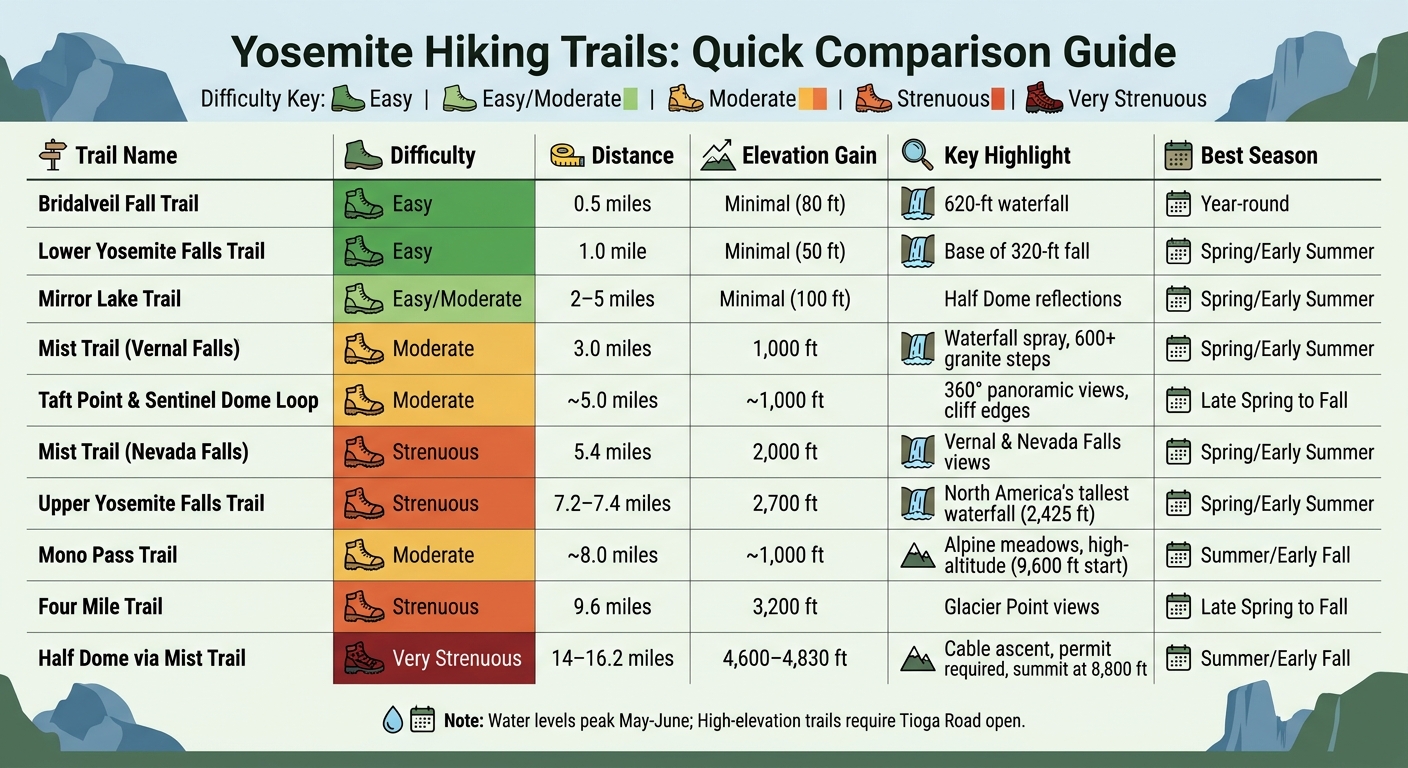
Yosemite National Park Hiking Trails Comparison Guide: Difficulty, Distance, and Best Season
Best Hikes in Yosemite National Park [2025 Guide]
sbb-itb-00512f3
1. Mist Trail to Vernal Falls and Nevada Falls
The Mist Trail is one of Yosemite’s most iconic hikes, offering spectacular views of the park’s waterfalls. Starting at Happy Isles (shuttle stop #16), this trail takes you to the 317-foot Vernal Fall and continues to the 594-foot Nevada Fall. As Russell Cook from National Geographic puts it:
The Mist Trail is the quintessential Yosemite hike and for good reason… the seven-mile (11-kilometer) trek along this trail affords multiple vantage points with some of the most breathtaking views the park has to offer.
If you’re visiting in spring or early summer, expect to get drenched by the heavy mist from the waterfalls – waterproof gear is a must. The trail follows the Merced River, passing Emerald Pool and Silver Apron, and offers incredible views of Liberty Cap and Half Dome along the way.
Trail Difficulty
The difficulty of the Mist Trail depends on how far you choose to go. The Vernal Fall Footbridge is a moderate 1.6-mile round trip with a 400-foot elevation gain, making it accessible to most hikers. However, reaching the top of Vernal Fall is more challenging, requiring a steep climb up over 600 granite steps, which can be slippery from the spray. For those aiming to reach Nevada Fall, be prepared for a strenuous 5.4-mile round trip with 2,000 feet of elevation gain – this hike demands good physical fitness.
Hike Length and Elevation Gain
| Destination | Distance (Round Trip) | Elevation Gain | Difficulty |
|---|---|---|---|
| Vernal Fall Footbridge | 1.6 miles | 400 feet | Moderate |
| Top of Vernal Fall | 2.4 miles | 1,000 feet | Strenuous |
| Top of Nevada Fall | 5.4 miles | 2,000 feet | Strenuous |
Key Highlights
To make the most of your hike, consider these tips: Wear sturdy hiking shoes with good grip, as the granite steps near Vernal Fall are often wet and can be crowded. Stay hydrated by carrying 2 quarts of water if you’re heading to Vernal Fall or 3-4 quarts for Nevada Fall. For a less steep and more scenic descent, take the John Muir Trail instead of returning down the Mist Trail’s stairway.
Important for 2026: From June 30 through October, the Mist Trail will be closed Monday through Thursday (7:00 am to 3:30 pm) for repairs. It will remain open on Fridays, weekends, and holidays.
2. Upper Yosemite Falls Trail
The Upper Yosemite Falls Trail is a demanding 7.2-mile round-trip hike that takes you to North America’s tallest waterfall, which plunges an incredible 2,425 feet. Built between 1873 and 1877, this historic trail is packed with over 100 switchbacks carved into loose, decomposed granite and sandy terrain. Be especially cautious on your way back, as the descent can be quite slippery.
About a mile into the hike, after climbing 1,000 feet, you’ll reach Columbia Rock. This spot rewards your effort with sweeping views of Half Dome and Sentinel Rock. From there, the trail continues upward, culminating in an overlook directly above the falls. As the National Park Service puts it:
A steep climb is well rewarded with close-up views of Upper Yosemite Fall and distant views of Half Dome and other Sierra mountain peaks.
Trail Difficulty
This trail is rated as strenuous and requires a high level of physical fitness. Most hikers spend between 6 to 8 hours completing the round trip. It’s not recommended for individuals with health conditions that could be aggravated by steep climbs or for families with young children. Additionally, the upper sections of the trail offer little shade, making summer hikes especially challenging. Spring, particularly from April to June, is the best time to experience this hike.
Hike Length and Elevation Gain
The trail features an elevation gain of about 2,700 feet, so come prepared. Each hiker should bring 3 to 4 quarts of water since there are no water sources along the trail. Starting your hike at dawn during the summer can help you avoid the most intense heat of the day.
Key Highlights
To navigate the rocky and sometimes slippery terrain, wear sturdy hiking boots with excellent grip. Be cautious near Yosemite Creek at the top – wading or swimming is dangerous due to the proximity to the waterfall. For those seeking even more adventure, you can extend your hike to Yosemite Point (an additional 1.6 miles) or Eagle Peak (an additional 5.8 miles) for breathtaking views.
3. Half Dome via Mist Trail
Half Dome is one of Yosemite’s most recognizable and demanding hikes, towering nearly 5,000 feet above the valley floor to an elevation of 8,800 feet. This 14- to 16-mile round-trip trek requires a permit when the cables are up. Permits are allocated via a lottery in March, with a limited number also available two days in advance. As the National Park Service cautions:
"The 14- to 16-mile round-trip hike to Half Dome is not for you if you’re out of shape or unprepared."
The hike begins along the famous Mist Trail, which connects Vernal and Nevada Falls before leading to the challenging ascent of Half Dome.
The Mist Trail takes you past Vernal Fall (317 feet) and Nevada Fall (594 feet), where you’ll navigate over 600 granite steps, often slick with spray from the waterfalls. The final 400-foot climb is aided by metal cables bolted into the granite. While you don’t need rock climbing gear, sturdy gloves are highly recommended for a better grip.
Trail Difficulty
This hike is considered extremely strenuous and is best suited for experienced hikers who are in good physical condition and comfortable with heights. Most people take 10 to 12 hours to complete the round trip, often starting at or before sunrise. It’s crucial to avoid the cable section if the rock is wet or if storm clouds are nearby, as most fatal accidents occur under these conditions. Plan a firm turn-around time – such as 3:30 pm – to ensure you descend before nightfall.
Hike Length and Elevation Gain
The trail includes a grueling 4,800-foot elevation gain over 14-16 miles. Be prepared: carry at least 1 gallon (4 liters) of water per person, wear well-broken-in boots with ankle support, and bring a dependable headlamp with spare batteries. Treated water is only available at the Vernal Fall Footbridge, so plan accordingly.
Key Highlights
Reaching the summit rewards hikers with breathtaking views of Yosemite Valley, Liberty Cap, and the High Sierra. In spring and early summer, the Mist Trail often creates rainbows in the spray, adding a magical touch to the journey – though you’ll likely get drenched along the way. Keep an eye out for black bears, which are active in the area. Always keep your food within reach and never leave your backpack unattended, especially near the cables.
4. Bridalveil Fall Trail
Bridalveil Fall offers a quick, family-friendly way to experience one of Yosemite’s stunning waterfalls. Standing at 620 feet, this waterfall flows throughout the year and is often the first one visitors encounter when entering Yosemite Valley. According to the National Park Service:
"A short walk will lead you to the base of Bridalveil Fall, allowing you to get an up close view of this often-windswept waterfall."
The fall gets its name from the way its water sways like a delicate bridal veil, especially during the spring runoff. For those who’ve tackled Yosemite’s tougher trails, this one provides a refreshing and scenic break.
Trail Difficulty
This trail is rated Easy, making it accessible to hikers of all abilities, including families with young children. The western trail to the base is paved, wheelchair-friendly, and allows leashed pets, making it one of Yosemite’s more inclusive options.
Hike Length and Elevation Gain
The trail is a short 0.5-mile round trip with an elevation gain of just 80 feet. During busy seasons, if the main parking lot is full, additional parking is available a few hundred yards east on Southside Drive. This adds only about 0.25 miles to your walk.
Key Highlights
During spring and early summer, the waterfall’s powerful spray can soak hikers and may even make the trail’s end inaccessible. Stick to the paved path, as the surrounding rocks and boulders can be dangerously slippery. In winter, icy conditions make the trail even slicker. Restrooms are located at the parking area, but note that there’s no drinking water available at the trailhead.
5. Lower Yosemite Falls Trail
The Lower Yosemite Falls Trail is a short, paved loop that brings you up close to the final 320-foot drop of North America’s tallest waterfall. As the National Park Service describes it:
This short, easy walk rewards with spectacular views of both Upper and Lower Yosemite Falls.
Along the way, you’ll also find educational exhibits that delve into the area’s natural and historical significance. This trail blends ease of access with stunning scenery, making it a favorite for many visitors.
Trail Difficulty
Rated as Easy, this trail is perfect for visitors of all ages and abilities. The eastern section of the loop is wheelchair-accessible when weather conditions allow, and the path is also friendly to strollers and leashed pets. Since parking isn’t available at the trailhead, the free Valleywide Visitor Shuttle (stop #6) is the best way to get there without hassle.
Hike Length and Elevation Gain
Covering a 1-mile loop with just a 50-foot elevation gain, this trail takes roughly 30 minutes to complete. Many hikers stop at the footbridge for a closer look at the falls. For the best views, it’s recommended to walk the loop clockwise.
Key Highlights
Spring and early summer are the best times to visit, as the falls are at their fullest, often creating a refreshing mist at the footbridge. Keep in mind that the falls usually dry up from late July to October. Stick to the paved path, as the rocks and boulders near the footbridge can be dangerously slippery. Conveniently, restrooms and a drinking fountain are located on the western side of the trail.
6. Four Mile Trail from Glacier Point
The Four Mile Trail, originally built as a toll trail in 1872, connects the valley floor near Sentinel Rock to Glacier Point. Despite its name, the trail is actually about 4.8 miles one way. According to the National Park Service:
"Views of Yosemite Falls and Yosemite Valley await hikers, topped off with a panorama of Half Dome and Sierra mountain peaks from Glacier Point."
This trail gives hikers incredible opportunities to take in Yosemite’s iconic landmarks, including Upper and Lower Yosemite Falls, El Capitan, and Half Dome. It’s a route steeped in history and packed with stunning scenery.
Trail Difficulty
This trail is rated Strenuous, with a consistently steep incline that makes it unsuitable for beginners. While some sections are paved, loose sand can make footing tricky, so caution is key. Stick to the marked path – cutting switchbacks can lead to unexpected ledges and dangerous drop-offs.
Hike Length and Elevation Gain
The trail spans 4.8 miles one way (9.6 miles round trip) and involves an elevation gain of approximately 3,200 feet. Most hikers take about 3–4 hours to reach Glacier Point and 6–8 hours for the full round trip. If you plan to hike one way, keep in mind there’s no free shuttle between Glacier Point and the valley. You’ll need to arrange private transportation or purchase a ticket for the seasonal tour bus.
Key Highlights
Roughly two-thirds of the way up, you’ll arrive at Union Point, a fantastic spot to take in Yosemite Valley from a unique vantage point. Starting your hike early is a smart move to avoid the midday heat and make use of the cooler morning shade. Be sure to bring plenty of water – at least 2 quarts for one way or 4 quarts for the round trip – since there are no water sources along the trail.
At Glacier Point, you’ll find vault toilets and a gift shop offering snacks during the operating season (late May through early October). The trail itself typically opens in May and closes by November or December, depending on snow conditions.
7. Taft Point and Sentinel Dome Loop
The Taft Point and Sentinel Dome trails share a trailhead off Glacier Point Road, making it possible to enjoy both in a single, half-day loop. Sentinel Dome is a standout for its 360-degree panoramic views, showcasing landmarks like Half Dome and the high Sierra peaks. On the other hand, Taft Point offers breathtaking views of the Dawn Wall on El Capitan and the Yosemite Valley floor below. Now, let’s dive into what makes these trails a great choice for beginners.
Trail Difficulty
These trails are perfect for beginners due to their relatively short distances and clear paths. The routes are easy to follow, though Sentinel Dome does involve some granite terrain as you approach the summit. Sturdy trail shoes are a good idea for better grip on the granite. At Taft Point, be extra cautious near the cliff edges – there are sheer drop-offs into the valley, and no guardrails are in place.
Hike Length and Elevation Gain
The Sentinel Dome Trail is 2.2 miles roundtrip (1.1 miles each way), while the Taft Point Trail is a little longer at 2.4 miles roundtrip (1.2 miles each way). When combined, the loop totals about 4.6 miles, with gentle elevation changes, making it a satisfying yet accessible hike.
Key Highlights
Both locations are incredible for sunrise and sunset photography. For a magical sunset, head to Sentinel Dome to see the golden light bathe Half Dome’s north face. If you’re an early riser, Taft Point at sunrise offers a stunning view of the first rays hitting El Capitan. Since these spots are popular during these times, remember to bring a headlamp for the return trip in the dark. Glacier Point Road generally opens in late May or June, once the snow has been cleared, and closes again during the winter months.
8. Mirror Lake Trail
Mirror Lake Trail offers a scenic and accessible hike perfect for families, with stunning views of Half Dome, Tenaya Canyon, Mount Watkins, and Washington Column. The first mile is a paved path, accommodating strollers and bicycles, while the rest transitions into a dirt loop where bikes and strollers are not permitted. This mix of surfaces provides a gentle yet engaging hike for all skill levels.
Trail Difficulty
This trail is considered easy to moderate, making it a great choice for beginners or families with young children. Photographer Noel Morata describes it as:
One of my favorite easy hikes on the Yosemite valley floor is Mirror lake. This flat, easy trail covers 2 miles round-trip over paved roads and dirt trails.
Hike Length and Elevation Gain
Hikers can choose between two routes: a shorter 2-mile round trip to the lake, which takes about an hour, or a longer 5-mile loop around the lake that takes 2 to 3 hours. Both options feature a minimal elevation gain of roughly 100 feet.
Key Highlights
Mirror Lake lives up to its name when conditions are calm, reflecting the dramatic granite cliffs surrounding it. Spring and early summer are the best times to visit if you want to see the lake at its fullest. By late summer, it often becomes "Mirror Meadow."
Practical tips: There’s no parking at the trailhead, so take advantage of the free Yosemite Valley Shuttle (stop #17). Bring your own water, as there are no facilities along the trail. Also, avoid crossing Tenaya Creek during spring snowmelt, as the swift water can be dangerous.
9. Mono Pass Trail
Mono Pass Trail takes you into Yosemite’s high country near Tioga Pass, offering a refreshing change from the park’s valley trails. This route showcases alpine terrain and sweeping granite vistas, providing a quieter, more serene hiking experience. The trailhead is conveniently located off Tioga Road, which is seasonally closed due to snow.
Trail Difficulty
The hike is moderately challenging, with a gradual and steady ascent. Compared to the steeper valley-to-rim trails, it’s more manageable. However, keep in mind the trail begins at a high elevation of about 9,600 feet. If you’re not used to thinner air, you might find the altitude a bit taxing. For those with some hiking experience or even fit beginners, the trail should be quite doable – just pace yourself.
Hike Length
The round trip spans roughly 8 miles, with most hikers completing it in 4 to 6 hours.
Key Highlights
Mono Pass Trail brings you into Yosemite’s high-elevation zone, where the treeline ends around 9,500 feet. During the short growing season, usually in July and August, the subalpine meadows come alive with vibrant wildflowers. The surrounding granite landscape, shaped by ancient glaciers and the rise of the Sierra Nevada mountains, adds a dramatic and otherworldly feel. It’s a peaceful escape from the bustling valley below, offering a unique perspective of Yosemite’s diverse beauty.
Trail Comparison Table
The table below provides a side-by-side look at the key details of various Yosemite hikes, helping you pick the perfect trail based on your fitness level, available time, and the sights you want to experience. It covers each hike’s difficulty, distance, elevation gain, standout features, and best season to visit.
| Trail Name | Difficulty | Length (Round Trip) | Elevation Gain | Key Highlights | Best Season |
|---|---|---|---|---|---|
| Bridalveil Fall Trail | Easy | 0.5 miles | Minimal | 620‑foot waterfall near valley entrance | Year‑round |
| Lower Yosemite Falls Trail | Easy | 1.0 mile | Minimal | Paved path; base of 320‑foot fall | Spring/Early Summer |
| Mirror Lake Trail | Easy | 2–5 miles | Minimal | Reflections of Half Dome in still water | Spring/Early Summer |
| Mist Trail to Vernal Falls | Moderate | 3.0 miles | 1,000 feet | Waterfall spray and footbridge views | Spring/Early Summer |
| Mist Trail to Nevada Falls | Strenuous | 5.4 miles | 2,000 feet | Views of Vernal and Nevada Falls with powerful cascades | Spring/Early Summer |
| Upper Yosemite Falls Trail | Strenuous | 7.2–7.4 miles | 2,700 feet | Valley panoramas and views of Yosemite Falls (2,425‑foot total drop) | Spring/Early Summer |
| Four Mile Trail | Strenuous | 9.6 miles | 3,200 feet | Glacier Point views and Sentinel Rock vistas | Late Spring to Fall |
| Taft Point and Sentinel Dome Loop | Moderate | ~5.0 miles | ~1,000 feet | Rock fissures and 360‑degree valley views | Late Spring to Fall |
| Mono Pass Trail | Moderate | ~8.0 miles | ~1,000 feet | Alpine meadows and high‑country granite landscape | Summer/Early Fall |
| Half Dome via Mist Trail | Very Strenuous | 14–16.2 miles | 4,600–4,830 feet | Steel cable ascent with summit panorama; advance permit required | Summer/Early Fall |
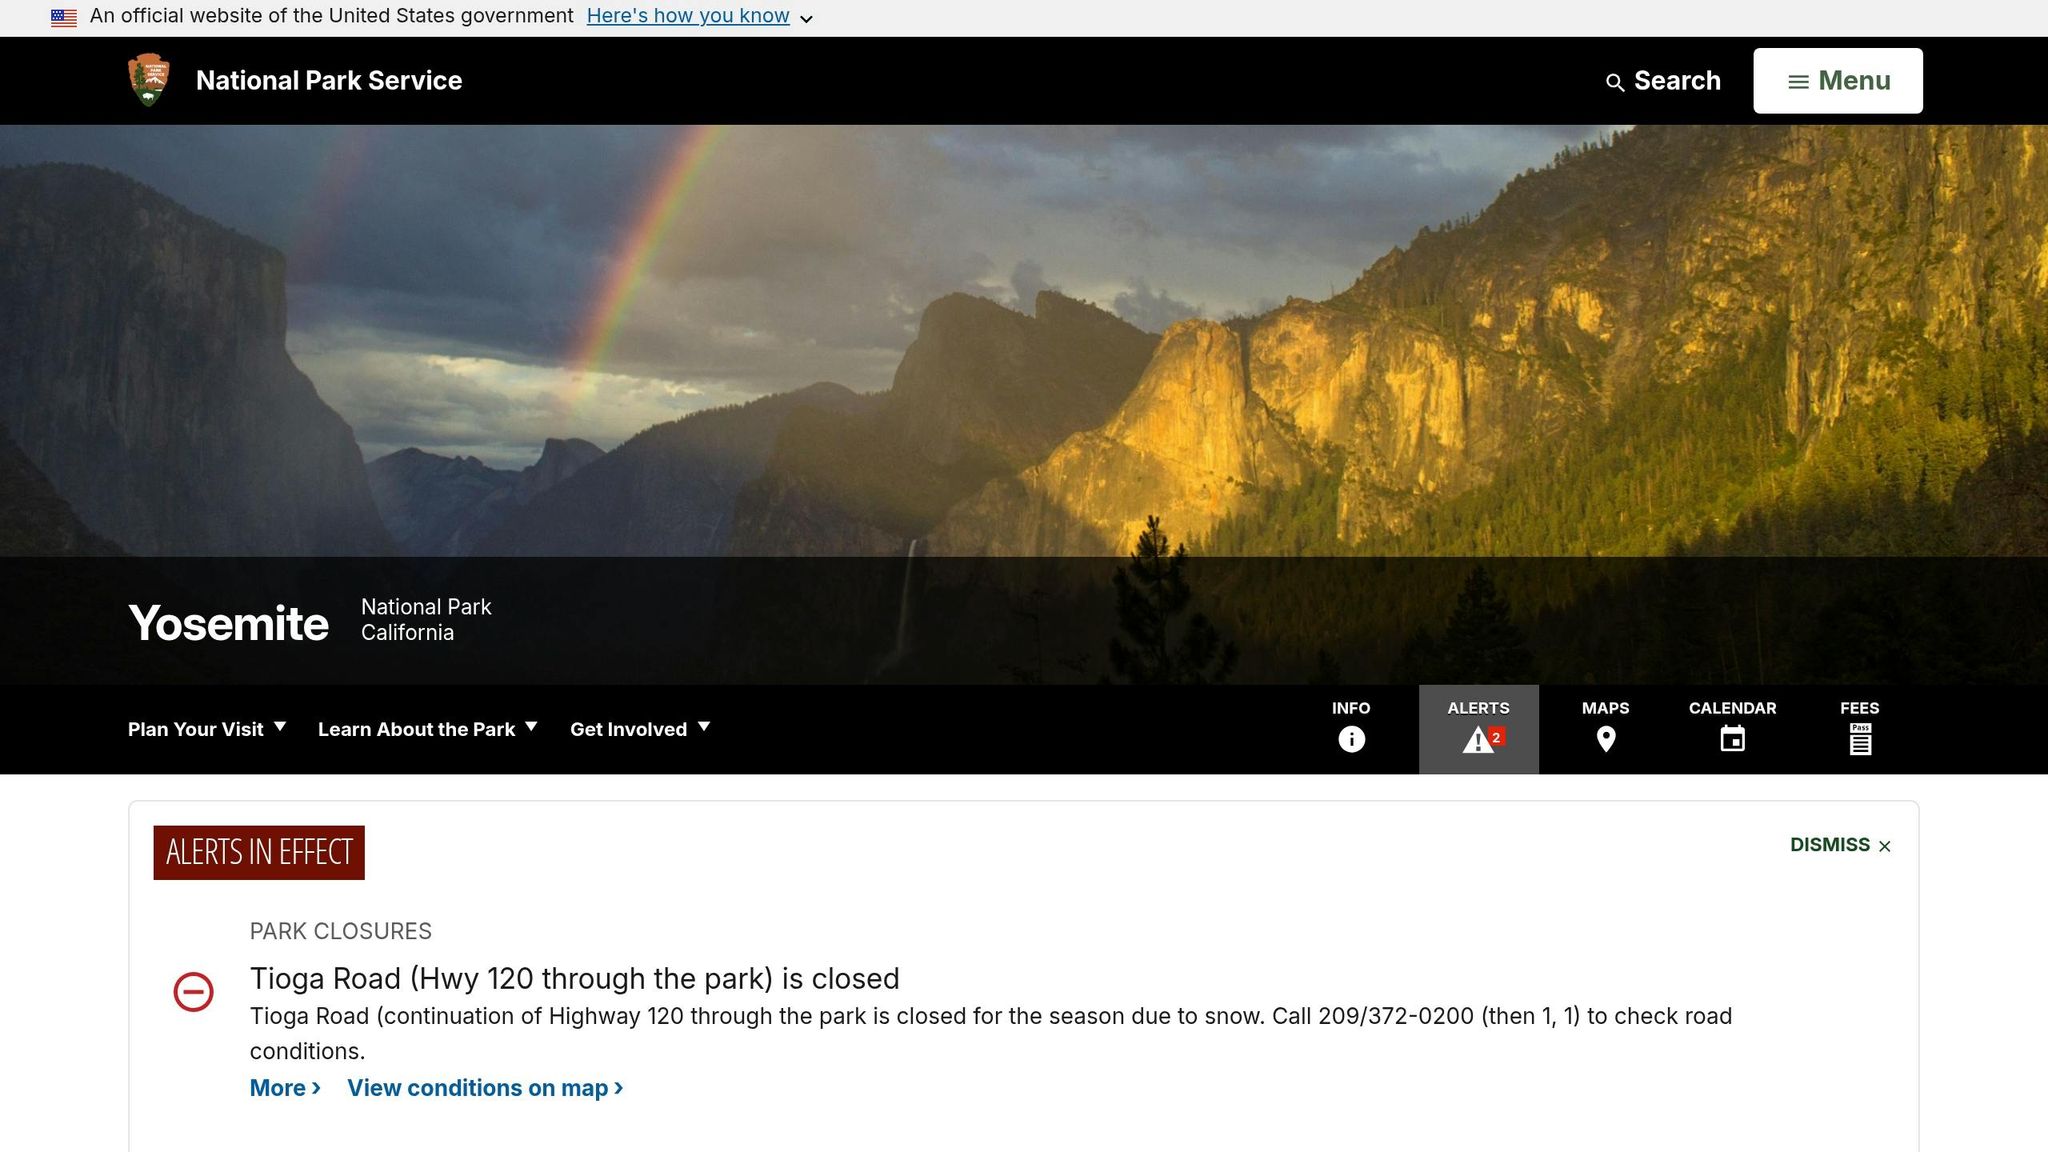
Waterfall trails are at their most impressive in May and June, but by late summer, many falls diminish significantly. High-elevation trails like Mono Pass depend on Tioga Road’s reopening, which usually happens in late spring or early summer after the snow has melted.
Conclusion
Yosemite National Park has trails for everyone, no matter your hiking experience. You can take a quick, relaxing walk to Bridalveil Fall or challenge yourself with the demanding 14–16-mile trek up Half Dome. For those seeking a mix of effort and reward, moderate trails like the Mist Trail to Vernal Falls offer stunning scenery without being overly strenuous. Meanwhile, tougher routes like the Four Mile Trail – with its steep 3,200-foot elevation gain – are perfect for seasoned adventurers. Whatever trail you choose, preparation and awareness of trail conditions are key to a safe and enjoyable experience.
Make sure to carry plenty of water – dehydration can sneak up on you fast. If you plan to drink from natural sources, treat the water before consuming it. Stick to marked trails to avoid unnecessary risks, and always check the latest conditions, especially for seasonal routes like Tioga Road. The free Yosemite Valley shuttle is a great way to reach trailheads while avoiding parking headaches. For popular hikes like Half Dome, don’t forget to secure your permit early. Watching official NPS hiking videos can also help you get familiar with the terrain and plan accordingly.
FAQs
Which Yosemite hike is best for first-timers?
The Glacier Point Trail is perfect for beginners. This quick and easy 0.6-mile (1-kilometer) loop takes just about 20 minutes to walk, making it a simple yet rewarding experience. Along the way, you’ll be treated to stunning views of Yosemite’s famous scenery, offering a glimpse of the park’s incredible beauty without the need for advanced hiking skills.
How do I get a Half Dome permit?
To hike Half Dome, you’ll need a permit – this is mandatory every day when the cables are up, typically from late May to mid-October, depending on weather and trail conditions. For day hikers, permits are distributed through a lottery system on Recreation.gov. The preseason lottery takes place in March, while daily lotteries are held throughout the hiking season. If you’re a backpacker staying overnight in Little Yosemite Valley, you won’t need to enter the lottery; your permit is included with your wilderness permit.
What should I pack for Yosemite day hikes?
Packing a lightweight daypack with the right essentials can make all the difference for your safety and comfort. Start with layered clothing – choose moisture-wicking fabrics and avoid cotton, which retains moisture. Add rain gear to stay dry in unexpected weather, and carry 2-3 liters of water along with a filter or purification method to ensure you stay hydrated. Pack plenty of snacks for energy and wear broken-in footwear to avoid blisters or discomfort.
For extra preparedness, consider including sun protection (like sunscreen and sunglasses), a map to stay on track, and a small first aid kit for minor injuries. Always check the weather forecast before heading out and adjust your packing list accordingly.